
Managing your Meta Business Portfolio isn’t just a technical chore — it’s one of the easiest ways to keep your business assets protected and your digital workflow running smoothly. When you’re bringing on agencies, advertisers, social media managers, or contractors, proper access settings make sure everyone gets exactly what they need without handing over more control than necessary.
Clear permission levels also reduce confusion, prevent security issues, and keep your online presence organized as your team grows. Assigning access through the Meta Business Portfolio is the safest, most professional way to work with partners, and it keeps your business ownership right where it belongs. At Betabyte Online, this is the setup we recommend for every business, big or small — and if anything feels confusing along the way, we’re always here to help.
Log In to Your Meta Business Suite
First, log into your Meta Business Suite and go to the main dashboard. You can get here through business.facebook.com.
Double-check that the business you want to manage is highlighted/selected in the upper left-hand corner if you have access to multiple pages.
Open Settings
Then go to Settings in the left-hand menu.
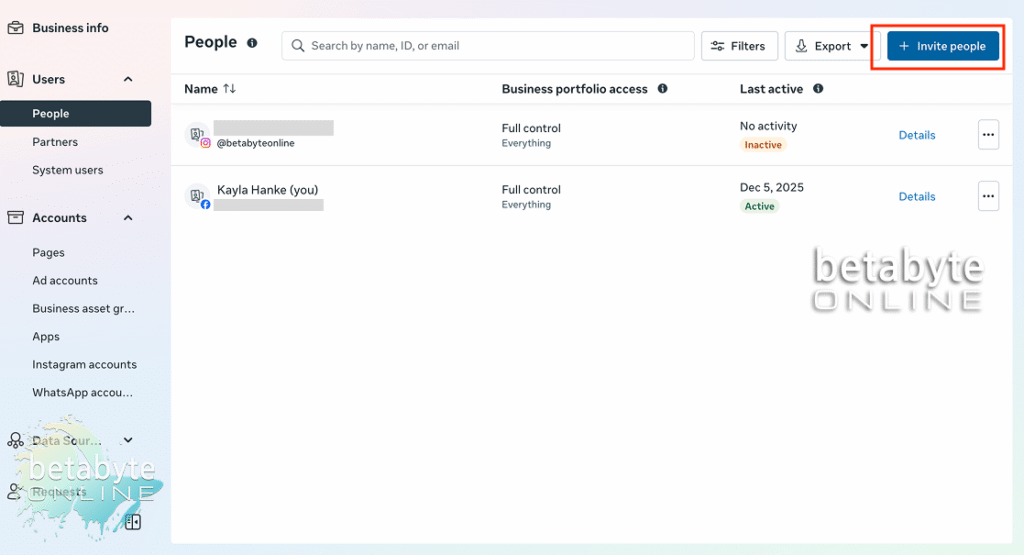
This will bring you to your business portfolio page and show a list of the people and users that have access to the page.
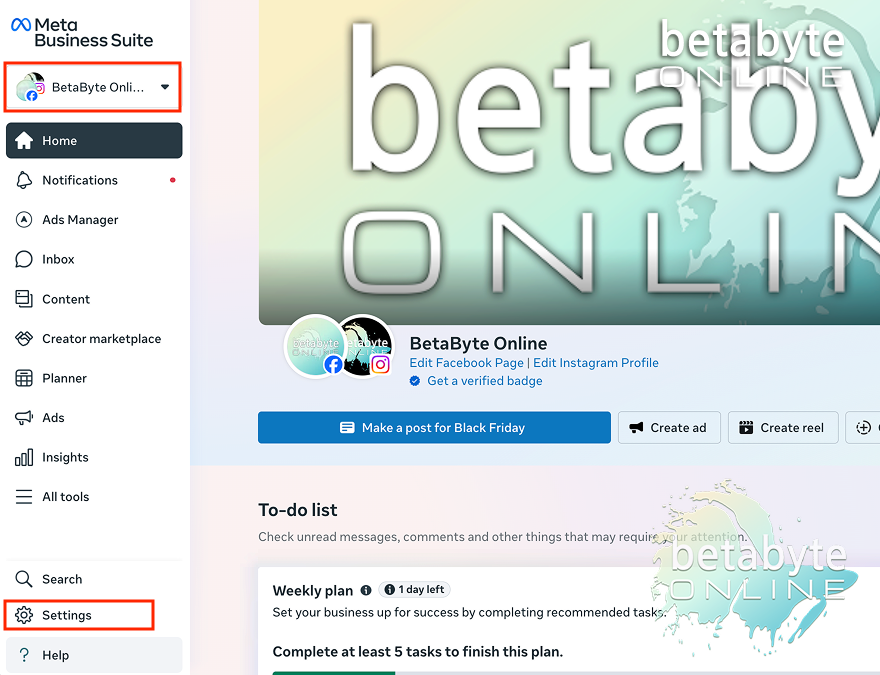
Note: If you are brought to another area of the Meta Business Portfolio, look at the secondary menu on the left side of the screen. Go to Users > People to see who currently has access.
Invite New Members
You can invite people using the top right button.
Click Invite
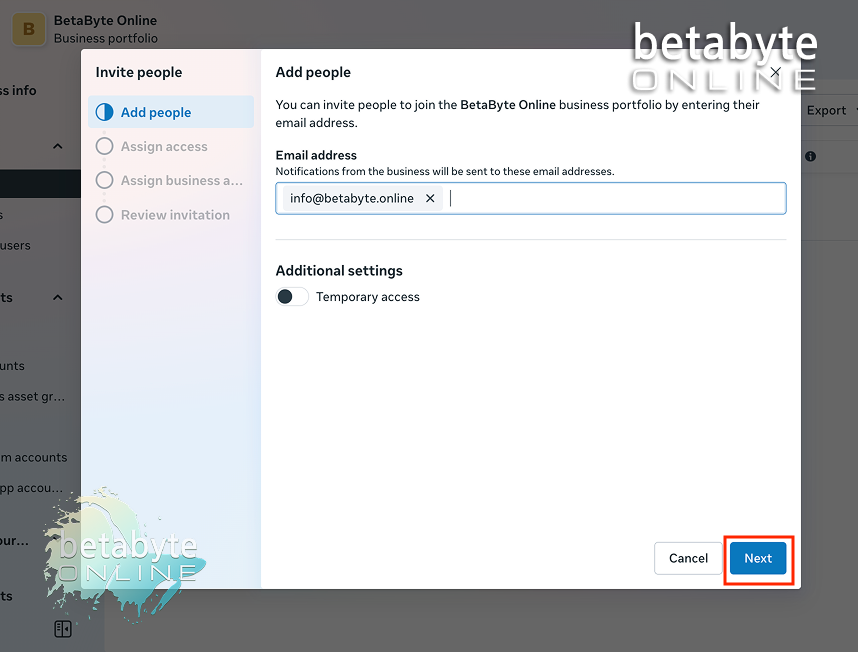
Enter the email address of the person you’d like to invite to manage the business portfolio.
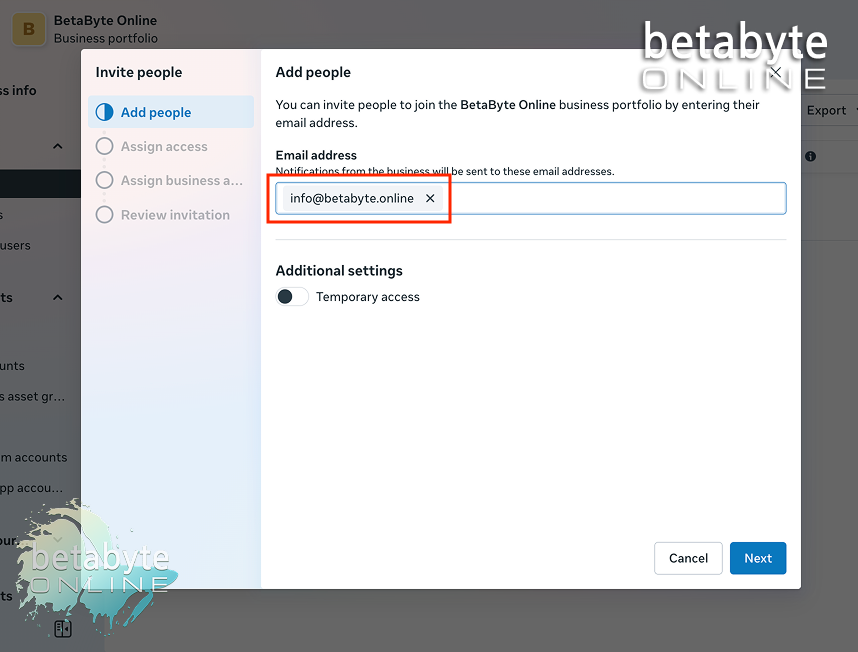
Assign Temporary Access (Optional)
In some situations, it might make sense to assign temporary access.
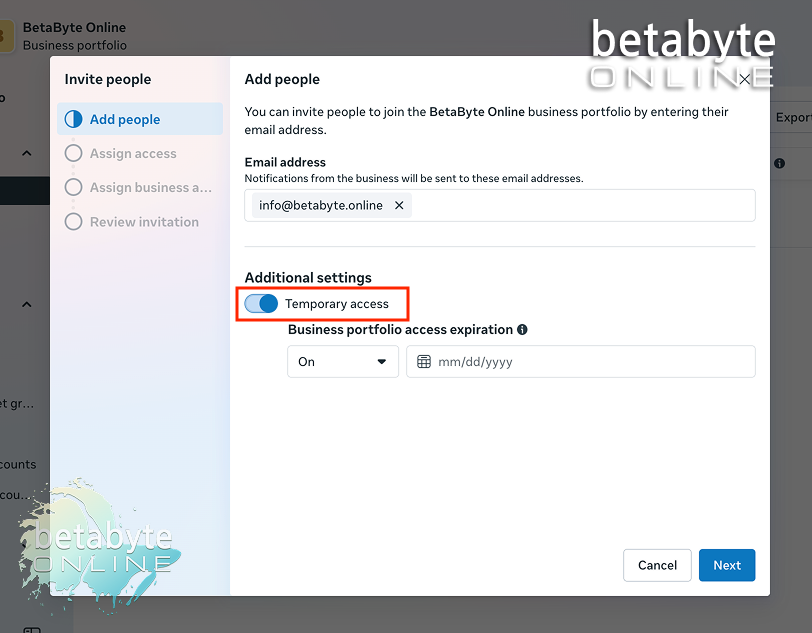
Examples include: a freelancer helping with a short-term campaign or a seasonal employee who only needs access for a few weeks.
Toggle on the temporary access setting and enter the date where you’d like access to the business portfolio to end.
Assign Level of Access
Decide what level of access the person needs.
Most of the time, partial access is sufficient, especially if you want to limit full permissions for security reasons.
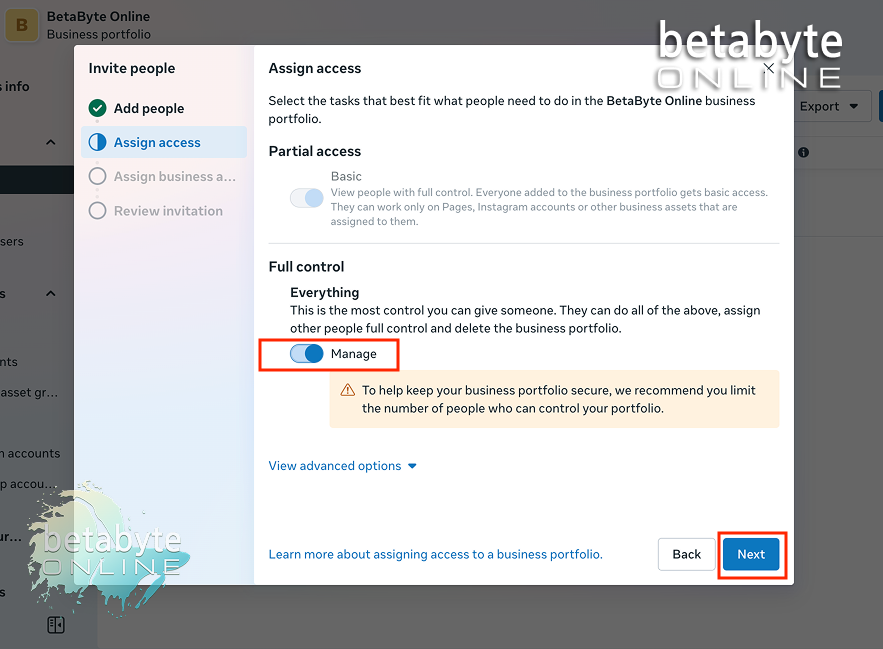
For agencies or trusted partners, full access may be preferable. This allows them to manage all assets, create campaigns, and make changes without repeatedly requesting permissions.
Select Access Level
Select your level of access, then press Next.
Assign Business Assets
On the next page, you can assign business assets to the person you’re granting portfolio permissions.
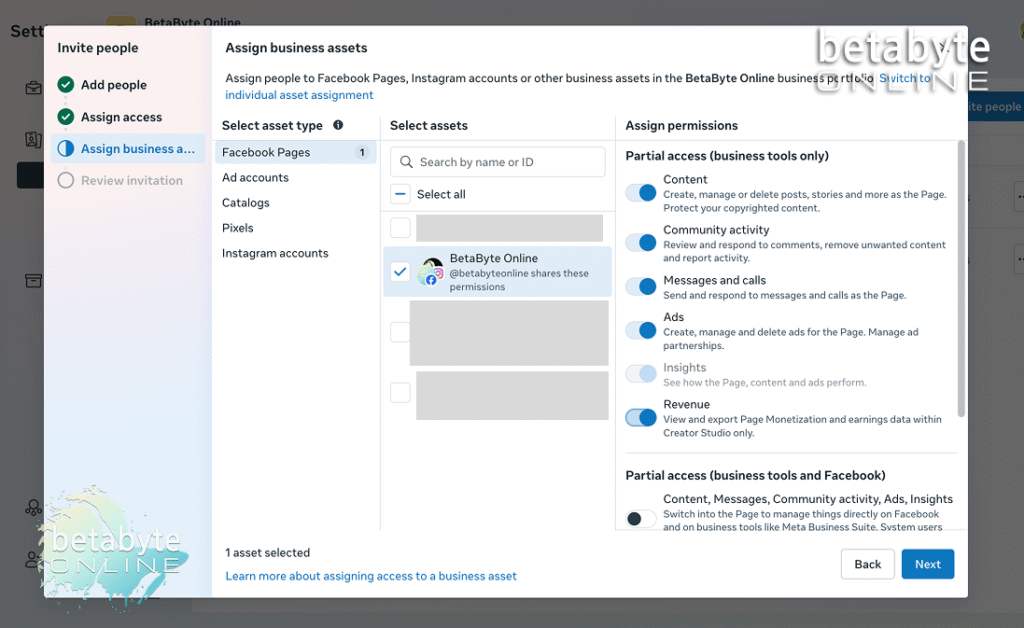
Example: For the BetaByte Online business portfolio, assign access to relevant assets like the Facebook Page and Instagram Page. Granting permission to these assets allows the member to manage posts, view insights, and create campaigns.
If you don’t assign business assets, the member will not be able to interact with them.
Other pages may appear here as well. Only select pages that are relevant to the tasks the new member needs to manage.
Toggle Features
Toggle on all the features you want this member to have access to. Scroll down to view more settings.
Selecting “partial access” automatically selects all the necessary prior toggles.
Selecting “full access” grants additional permissions: switch into the Page to manage everything on Facebook and Meta Business Suite, give access to others, remove anyone from the Page (including yourself), and delete the Page. System users cannot perform some sensitive tasks.
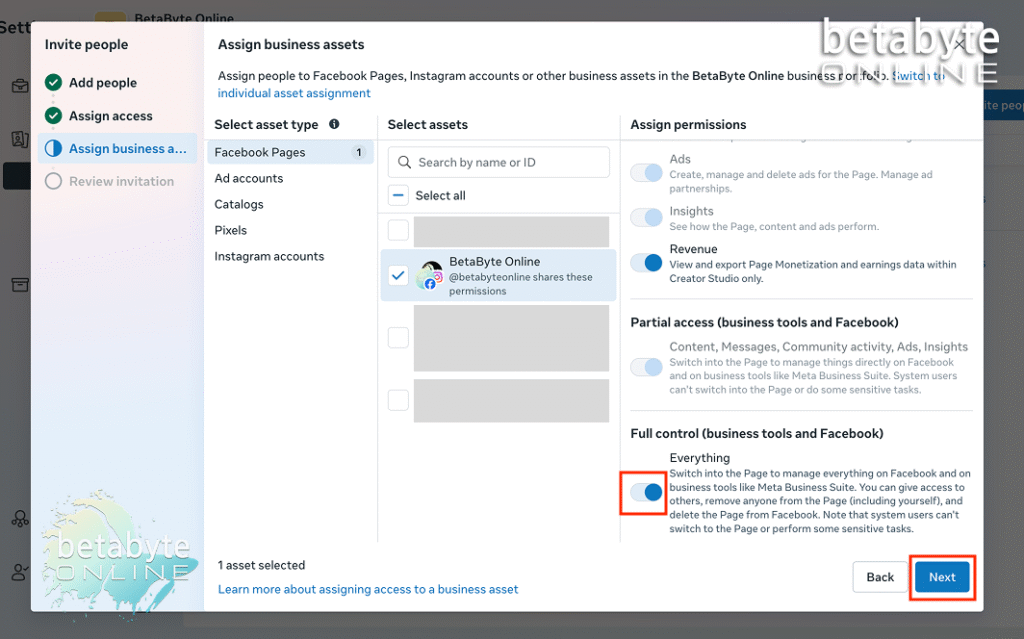
After selecting the access level, click Next.
Review and Submit
You’ll have a chance to review all of the information before selecting Submit.
Invite with Assigned Assets
Make sure everything is correct, then select Invite with 1 asset (or however many assets you assigned).
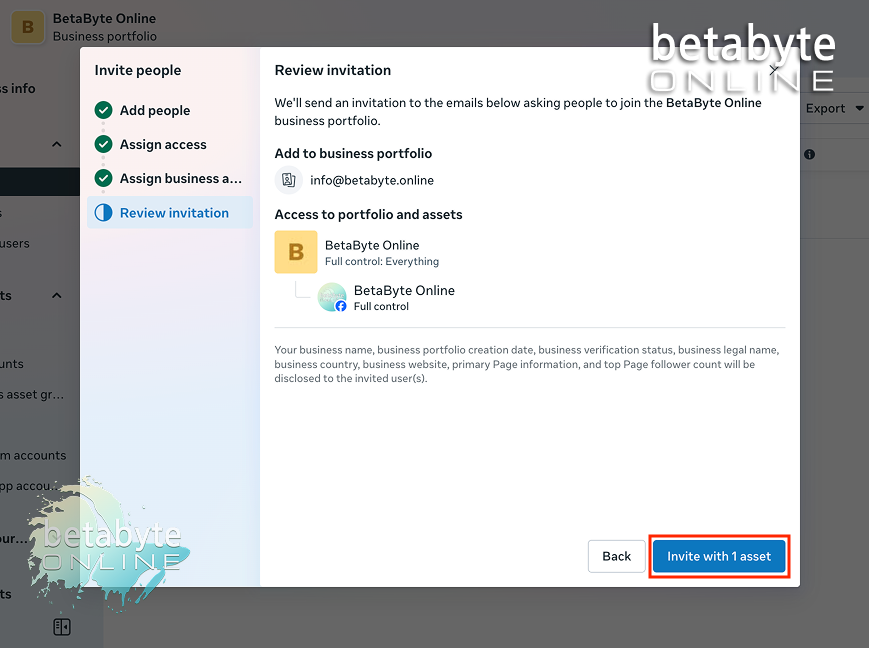
Congrats! Facebook will notify the invitee. Invitations expire after 30 days, so contact the person directly to ensure they accept in time.
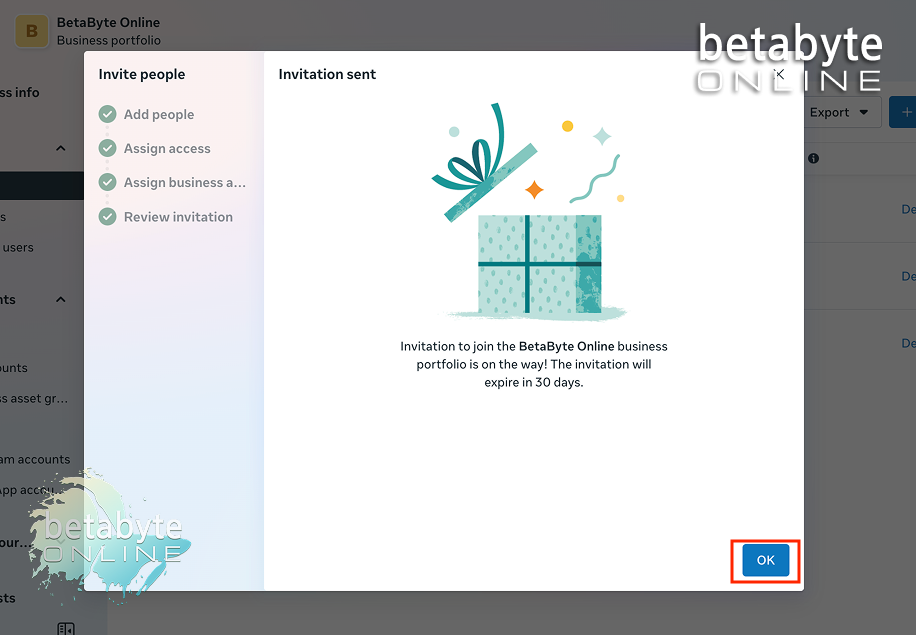
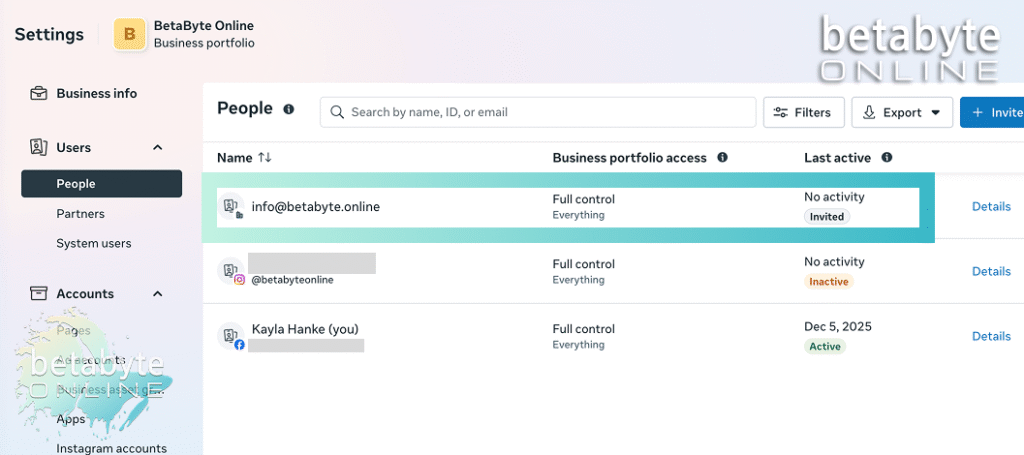
When you close the popup, you’ll see the invited member on your users list. Navigate back to Users > People if you leave the page. Once the invitation is accepted, the gray “Invited” icon will turn into a green “Active” badge.
What the Invitee Will See
The email will be titled:
Action required: You’re invited to join the BetaByte Online business portfolio
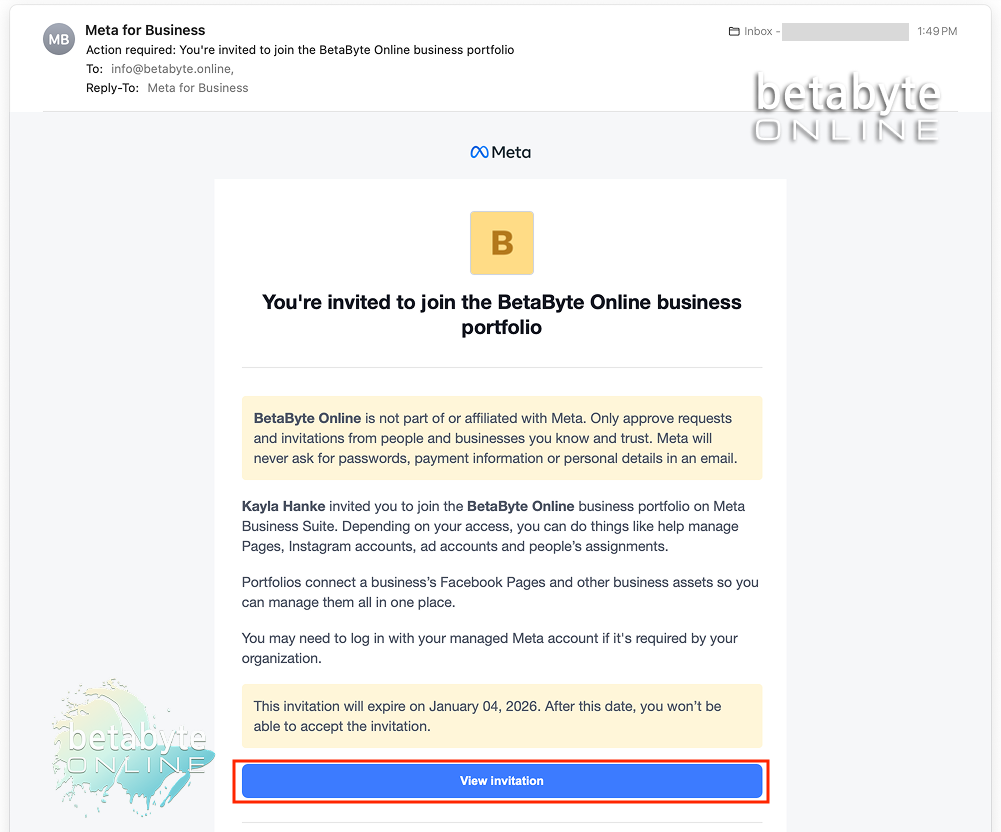
They should select View Invitation, and Facebook will open in a new window prompting them to accept access.
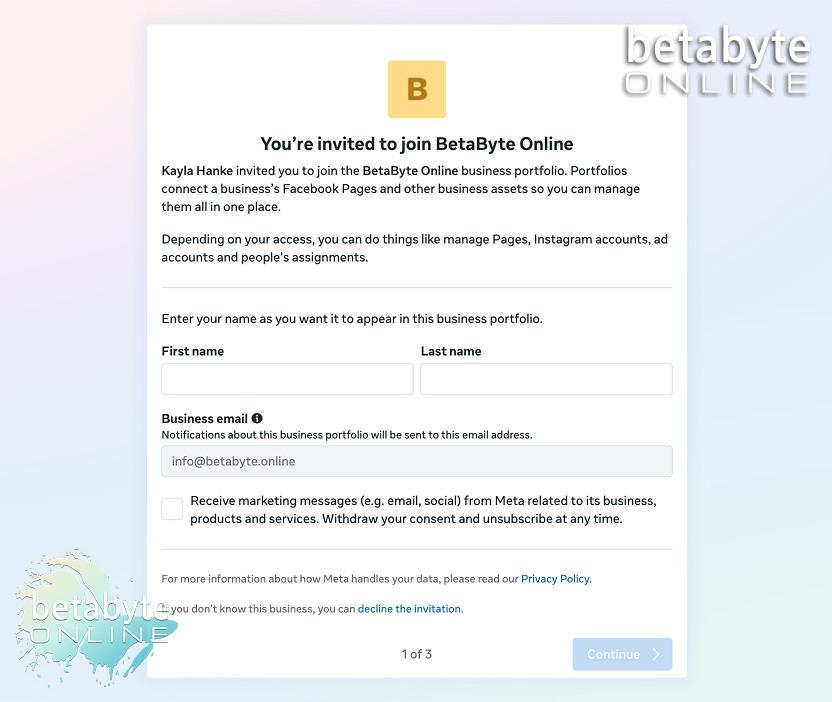
Enter Name and Email
Enter their first and last name.
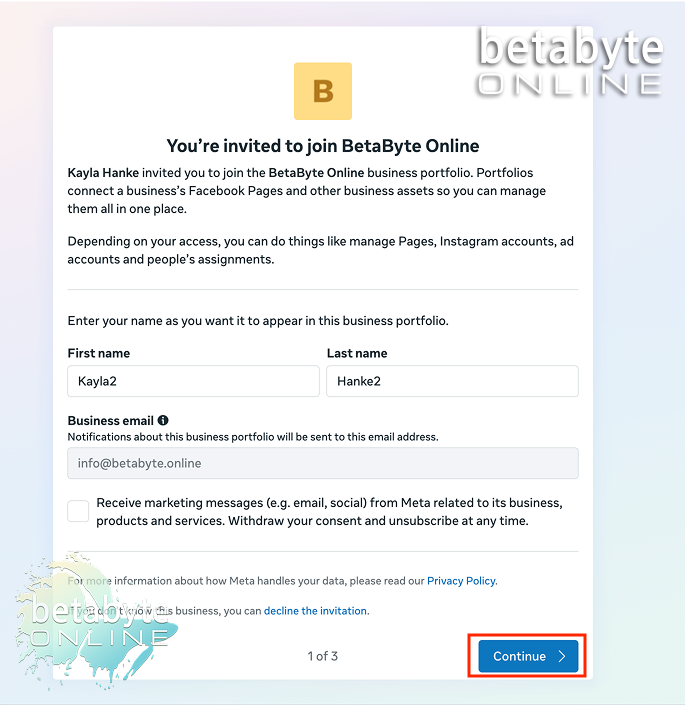
Note: They do not need a personal Facebook account to be assigned access. You can use a work email unrelated to any personal Facebook account. If access seems confusing, it’s likely a mix-up between business portfolio access and page admin access.
After reviewing the page information, select Continue.
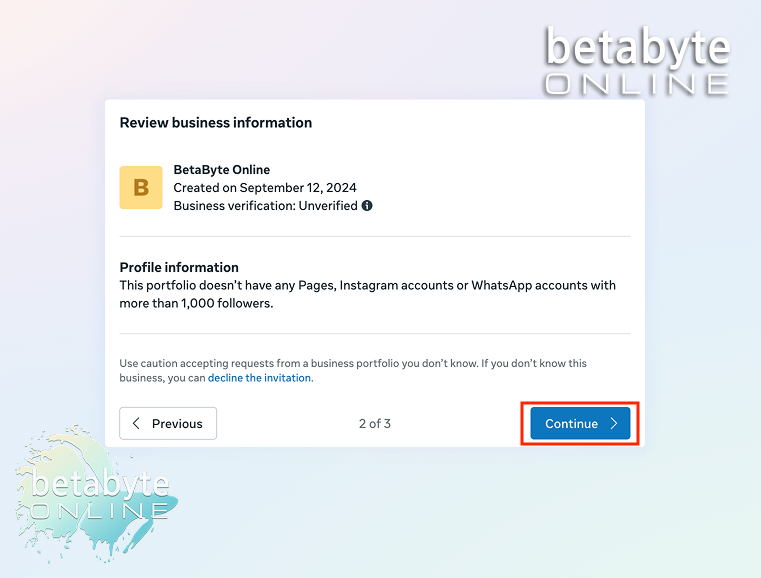
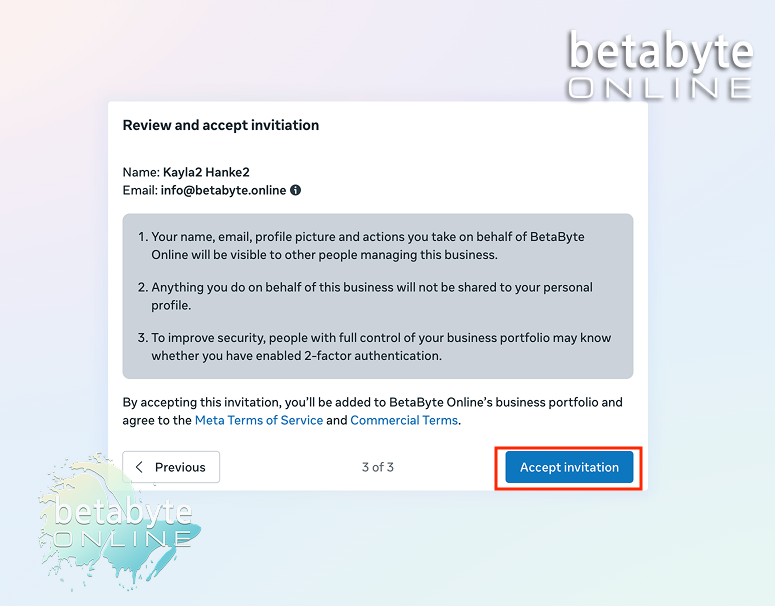
Review the terms, then select Accept Invitation.
Congrats! You did it!
Reach out to BetaByte Online if you need more help — we’re happy to assist anytime.