

Stripe is one of the most popular payment processors for online businesses and developers. It powers millions of websites and processes huge volumes of payments each year, which is why so many WordPress plugins (and SaaS services) build integrations for it. If you want to reduce the extra fees charged by some third‑party connectors, one effective trick is to create a restricted API key in your Stripe dashboard and use that key inside your own code or plugin integrations instead of “connecting via” a third‑party OAuth flow. This lets payments flow directly into your Stripe account while limiting what the key can do for security.
Why people try to bypass third‑party fees (and what Stripe actually charges)
Stripe charges fees for processing payments, and those fees vary by country, card type, and payment method. A common baseline in the U.S. historically is about 2.9% + $0.30 per successful card transaction, though exact rates depend on your account and region. If you connect a paid membership plugin through a third‑party integration that tacks on an extra platform fee (for example a 2% add‑on), you can end up paying more than necessary. If you control the Stripe account and integration yourself, you avoid the plugin vendor’s extra cut. (Rates vary — check Stripe’s pricing for your country.)
Quick note about safety and compliance
Before you go create keys and wire them into plugins, remember: storing API keys in the wrong place, or giving them overly broad permissions, can expose your Stripe account to fraud or accidental charges. Use restricted keys with the minimum permissions you need, enable two‑factor authentication on your Stripe account, and never publish secret keys in client‑side code or public repos. Stripe has best‑practice guidance on key safety. Stripe Docs
Step 1: Create a restricted Stripe API key
Open the API keys page
Sign into your Stripe Dashboard and go to Developers → API keys. From there you can create restricted keys or clone an existing one.
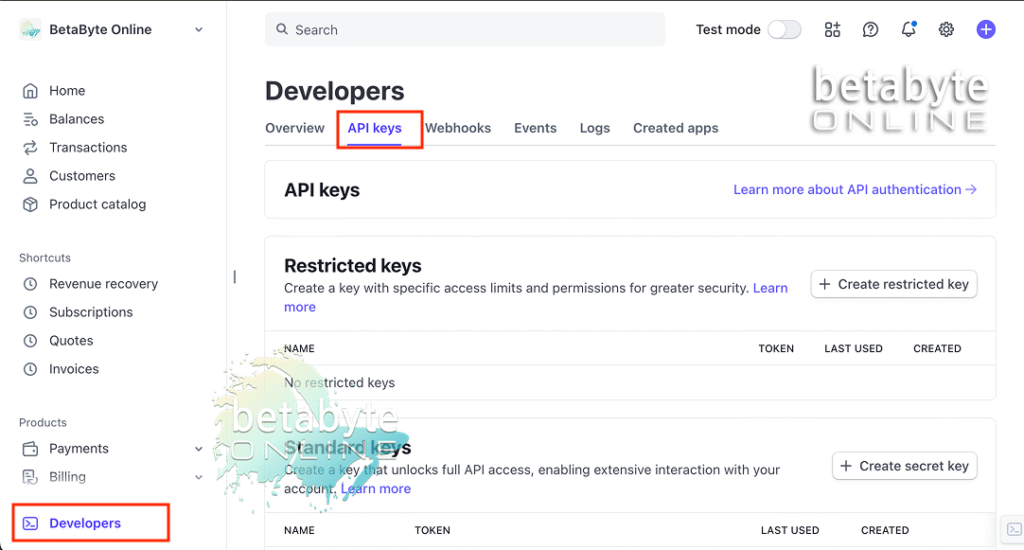
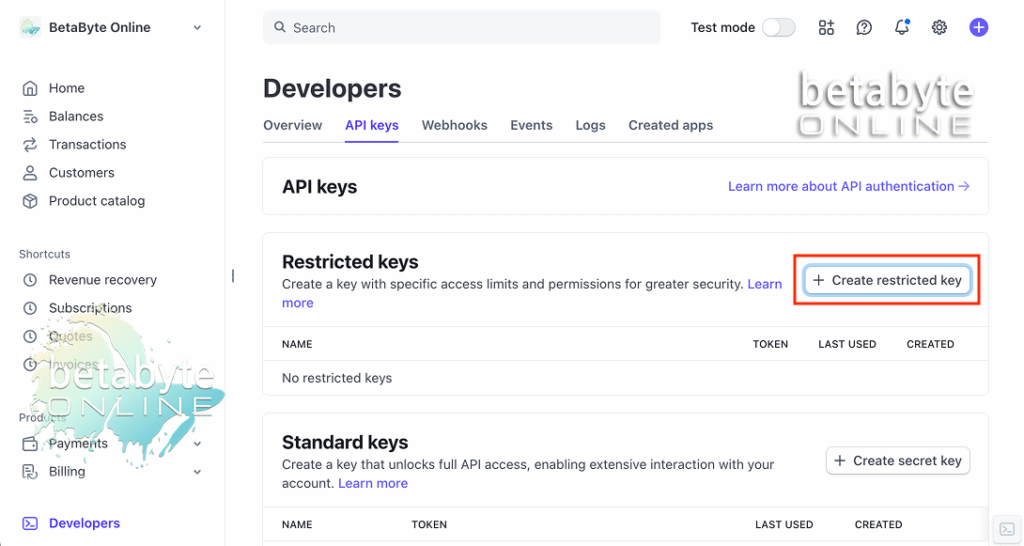
Choose “Create restricted key”
Click Create restricted key.
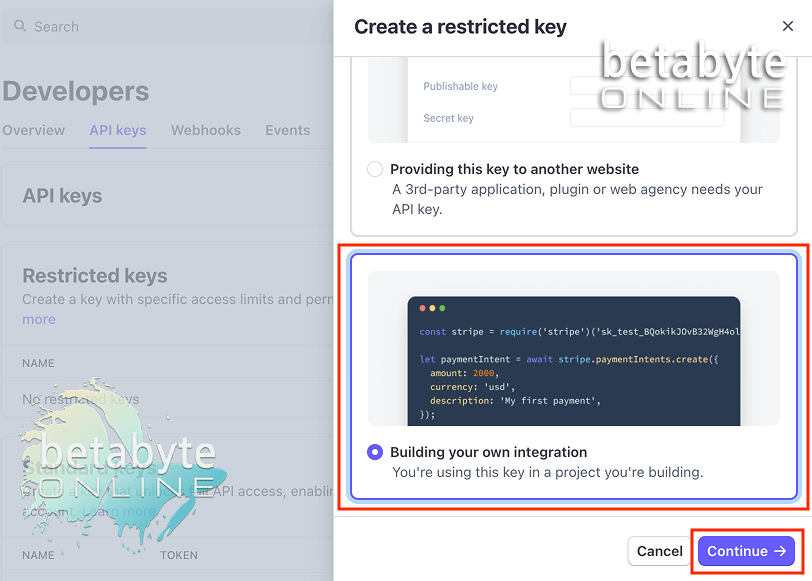
Stripe will ask how you plan to use the key. Choose the option that best matches your use case: if you’re charging customers on your own site (e.g., using Paid Memberships Pro on a WordPress site), select “My own business / project” so Stripe sets the key context correctly. The distinction matters because a key for “My own project” indicates you are the merchant of record and payments route to your Stripe account.
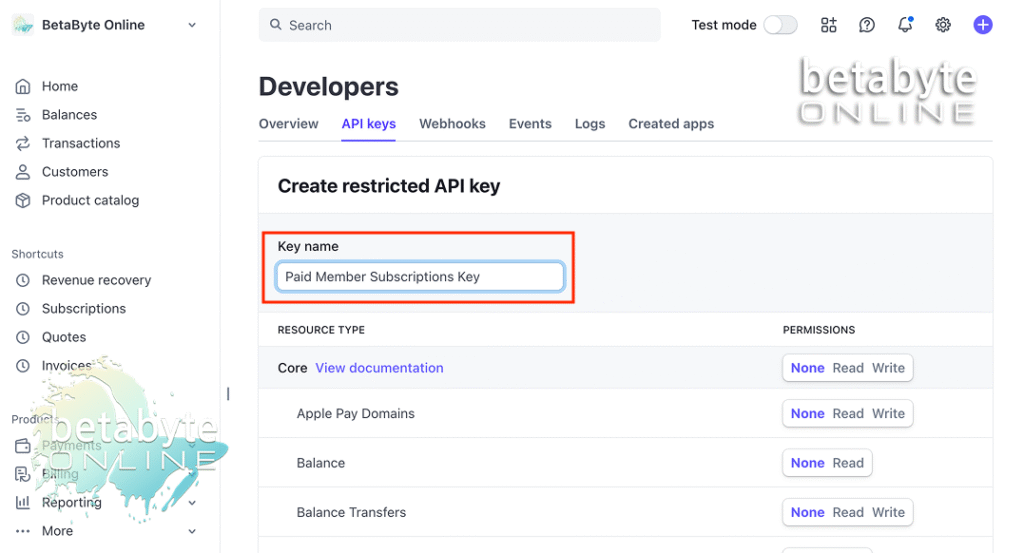
Name the key for organization
Give the key a meaningful name such as Paid Memberships Key or WP Subscriptions Key so you know where it’s used later.
Step 2: Choose permissions — the minimum set to run membership payments
Below are the Stripe resources you’ll want this restricted key to access. (Stripe uses Write for full access, which implicitly covers read actions for that resource — so choosing Write is equivalent to Read+Write in many cases.)
Charges — Write
This allows creating one‑off charges when needed.
Customers — Write
This allows creating and updating customer objects (cards, billing info).
PaymentIntents — Write
This lets you create PaymentIntents, which is Stripe’s recommended approach for modern card flows.
SetupIntents — Write
This allows saving payment methods for future payments (useful for subscriptions).
Checkout Sessions — Write
This enables server‑side creation of hosted Checkout sessions if you use Checkout.
Invoices — Read
Read access for invoices can be useful if your plugin needs to display invoices or check invoice status (no write needed for basic membership flows).
Subscriptions — Write
If you sell recurring plans, this permission is required to create and manage subscriptions.
Webhook Endpoints — Read
Reading webhook endpoints allows integrations to verify or list configured webhooks; write isn’t required for most setups (webhooks themselves are how Stripe notifies you of events).
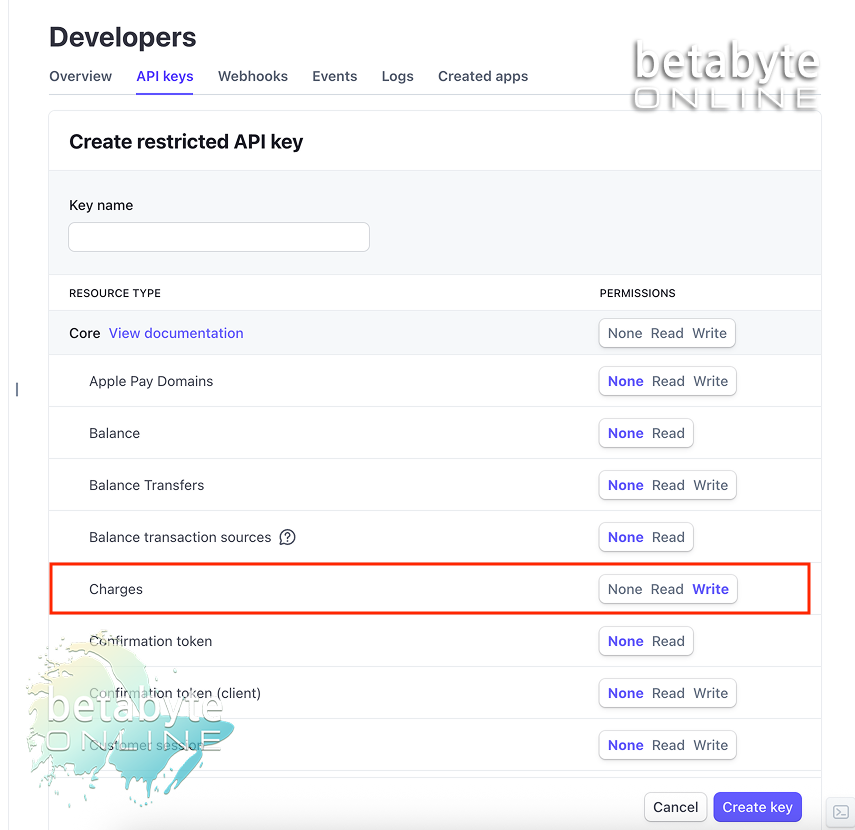
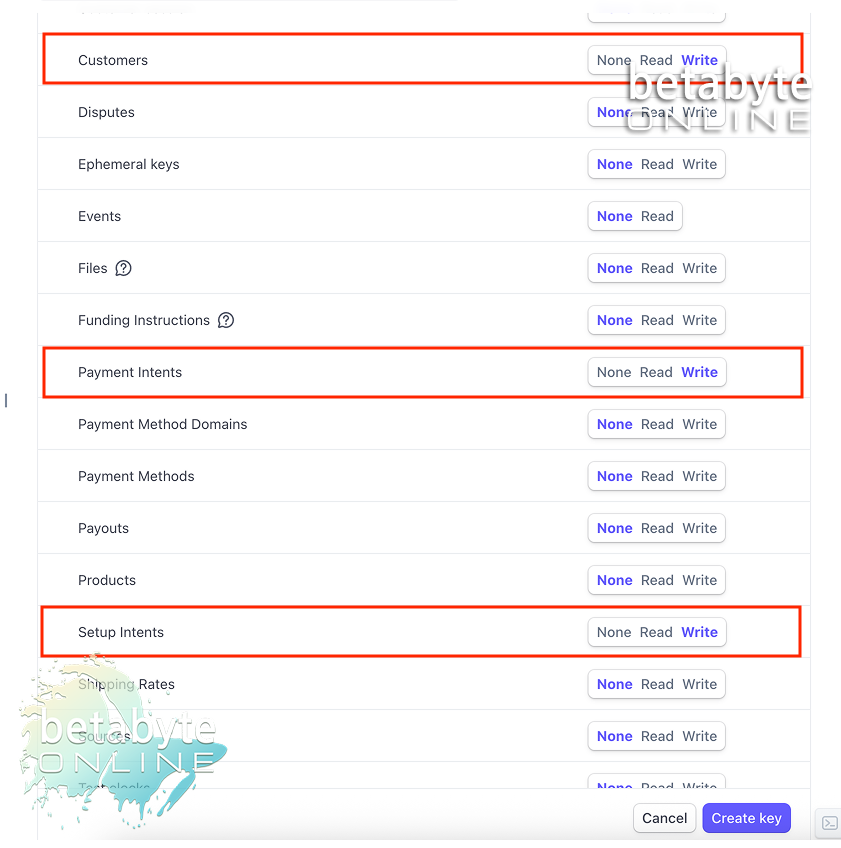
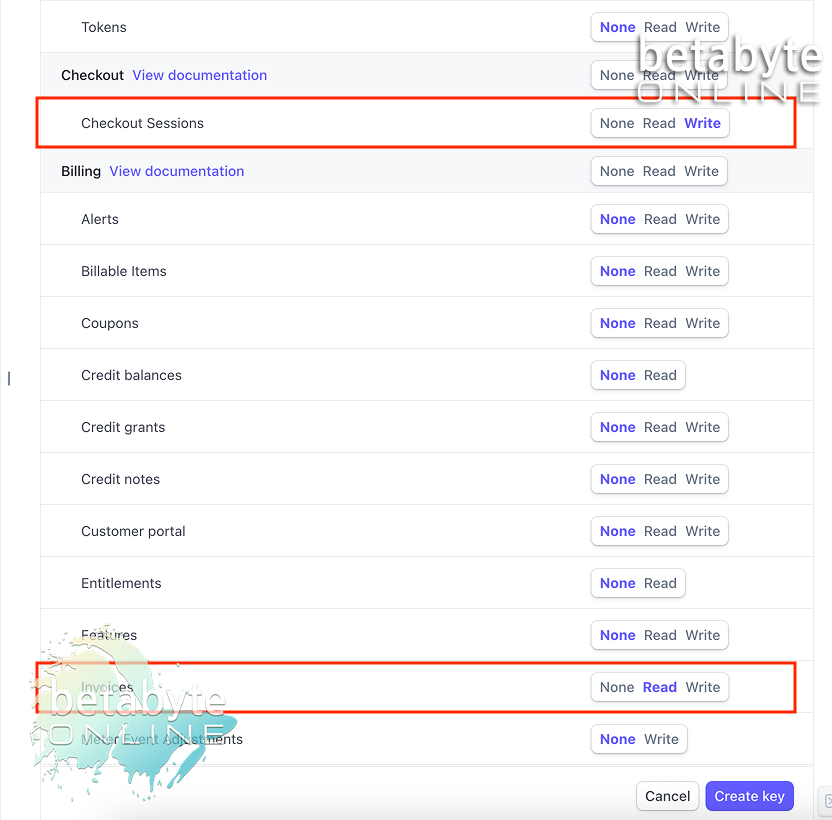
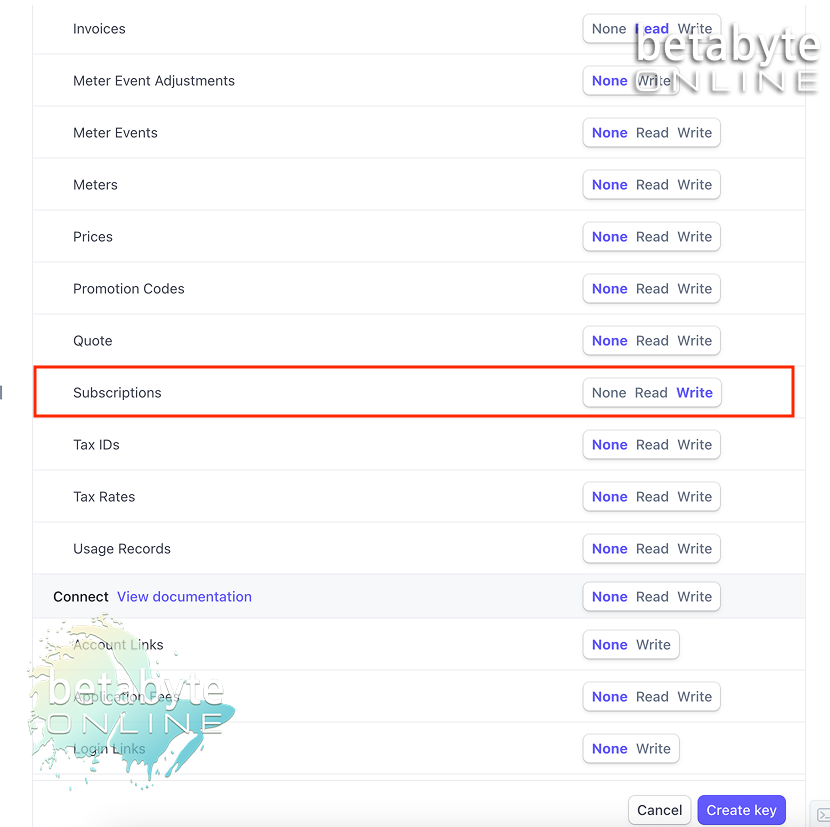
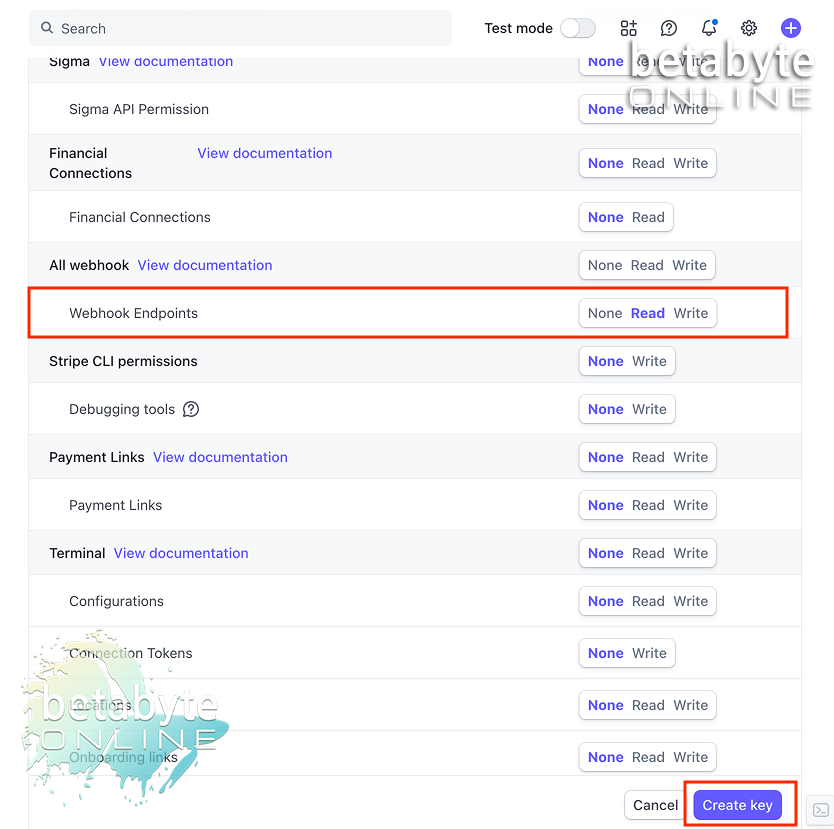
Stripe’s docs explain that “Write” typically includes read privileges for the resource; if a plugin’s docs ask for both read and write, picking Write in Stripe satisfies that requirement. Also, be careful: if you pick a permission that the integration calls and the key lacks, Stripe will return a permission error.
Step 3: Create the key and complete verification
Create the key
Select Create key after assigning permissions. Stripe will usually require two‑factor authentication and may prompt for email confirmation or phone verification before the key is active. Follow the verification steps (click the emailed link and enter the SMS code Stripe sends to your phone).
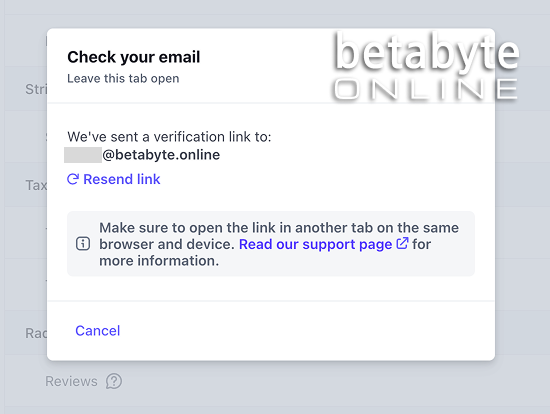
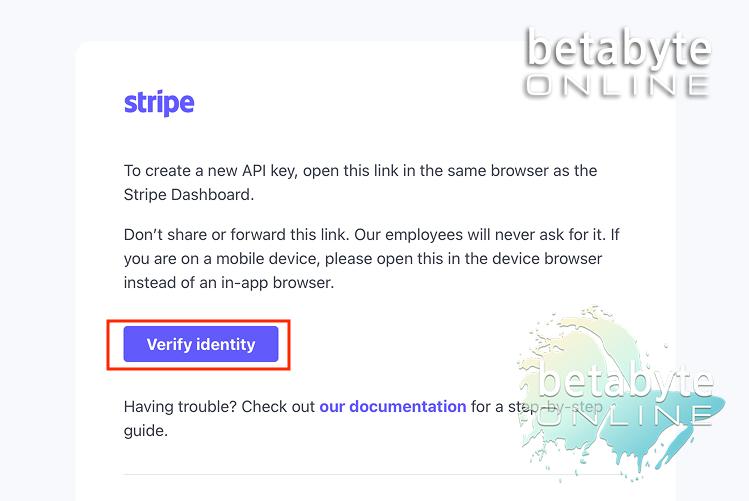
Once complete, Stripe shows the key; copy it to your clipboard.
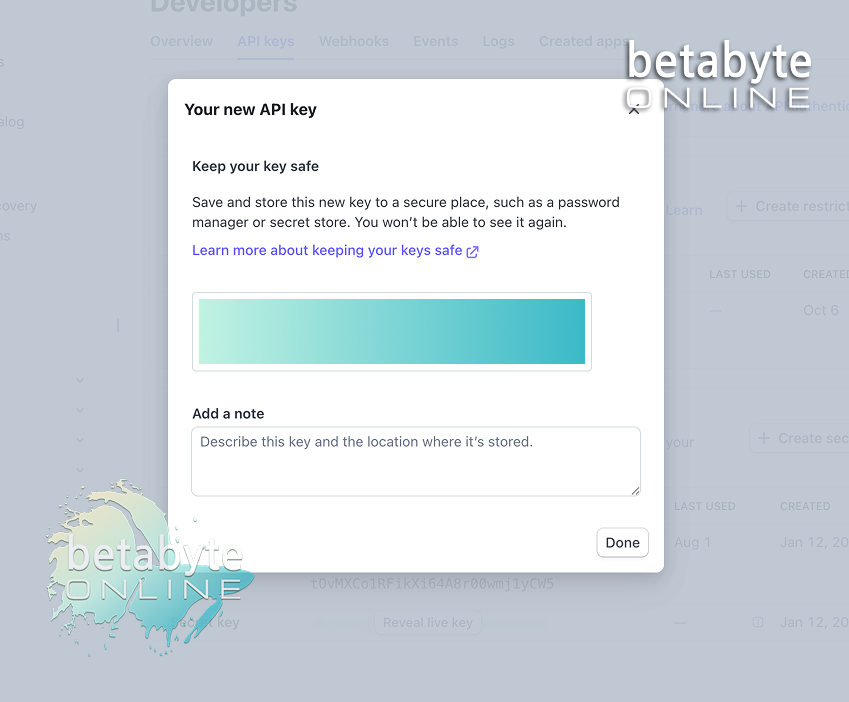
Where to store it
Place the key in your plugin or server environment variable (never paste a secret key into client‑side JavaScript or public repositories). For WordPress plugins that accept a “secret key” field, paste it into the server‑side setting. For custom code, store it in a server config or secure secrets manager.
What this restricted key lets you do (and other developer uses)
When configured with the permissions above, your restricted key lets your app or plugin:
Accept one‑time and recurring payments
You can create PaymentIntents or Subscriptions directly under your Stripe account so funds land in your Stripe balance without a third‑party platform taking an extra fee.
Save customers and payment methods
You can store customer objects and payment methods so returning customers have saved checkout experiences.
Create Checkout sessions
If you want Stripe’s hosted Checkout page, your server can create sessions on demand.
Read invoices and webhook endpoints
You can monitor invoice status and verify that your webhook endpoints are configured properly.
If you don’t want to use this key for a Paid Memberships Pro flow, you can still use it for custom storefronts, donation forms, subscription APIs, or internal tooling that processes payments in your Stripe account. Developers also use restricted keys for microservices that need narrow access to Stripe (for example, a billing worker that only writes charges and subscriptions but can’t read or delete other sensitive resources). For advanced app use, Stripe also supports permissioned RAKs (restricted app keys) in Stripe Apps. Stripe Docs+1
Security notes and best practices
Keep the key restricted and rotate regularly
Only grant the permissions your integration needs. If an employee or service no longer needs the key, revoke it in the dashboard. Rotate keys periodically and update your services.
Use webhooks for event handling
Don’t rely on polling. Use webhook events (for example invoice.paid, payment_intent.succeeded, invoice.payment_failed) to drive membership access and notifications. Keep your webhook endpoints secure and verify Stripe signatures on incoming events.
Limit exposure
If you can, restrict the key to certain IPs (where supported) and store it in an environment variable or secret manager, not in code.
Quick examples of how you might use the key
Use case: Paid memberships plugin (WordPress)
Instead of clicking “Connect with Stripe” inside a paid‑membership plugin (which may establish an OAuth connection and in some cases route through a platform with fees), create a restricted key and paste it into the plugin’s server‑side API key field. The plugin can then create customers, setup subscriptions, and receive webhooks while payments go straight to your Stripe account.
Use case: Custom checkout or donation form
Your server calls Stripe’s PaymentIntent API using the restricted key to create a one‑time charge or a subscription, then your front end completes the 3D Secure (if required) flow. Because the key only has the needed permissions, even if it is leaked the damage is limited.
Use case: Internal billing tools
Build small admin tools for issuing refunds, generating invoices, or reconciling payments using a restricted key that only has the appropriate resource permissions.
Get the Most from Your Stripe API Key
Creating a restricted Stripe API key is a great way to keep payments on your own account, reduce platform fees, and retain control over billing logic. Beyond membership plugins, restricted keys are handy for building internal tools, automating billing, integrating CRM billing, or powering a custom checkout experience that perfectly matches your brand.
If you’d like, BetaByte Online can help generate the correct restricted key settings, paste the key into your plugin, create the webhook handlers, and test the whole flow. We’ll also help you balance security and functionality so you keep fees low without opening the door to risk.