

Spam bots are hideous. I once took just a three-day weekend away from my inbox, and when I came back, there were over 400 spam emails waiting for me. These bots are designed to flood your forms, overwhelm your organizational email account, and look for security weaknesses.
If your website collects personal information, credit card details, or any sensitive data, it’s crucial to have a reCAPTCHA system in place. Otherwise, spam bots can:
- Fill your inbox with junk submissions
- Hurt the legitimacy of your domain
- Cause Google to mark your website as “spammy,” which impacts your SEO rankings
With AI-powered bots becoming more sophisticated, adding reCAPTCHA is no longer optional — it’s essential.
Step 1: Make Sure WPForms Is Installed
First, ensure that you have the WPForms plugin installed and activated on your WordPress website.
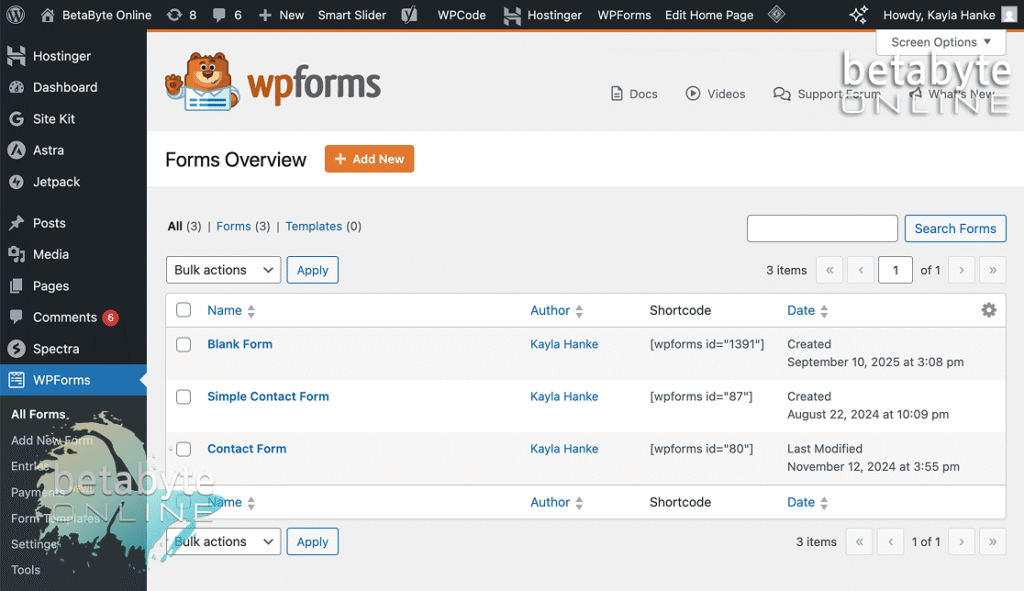
Step 2: Open the Form You Want to Protect
Go to WPForms > All Forms in your WordPress dashboard.
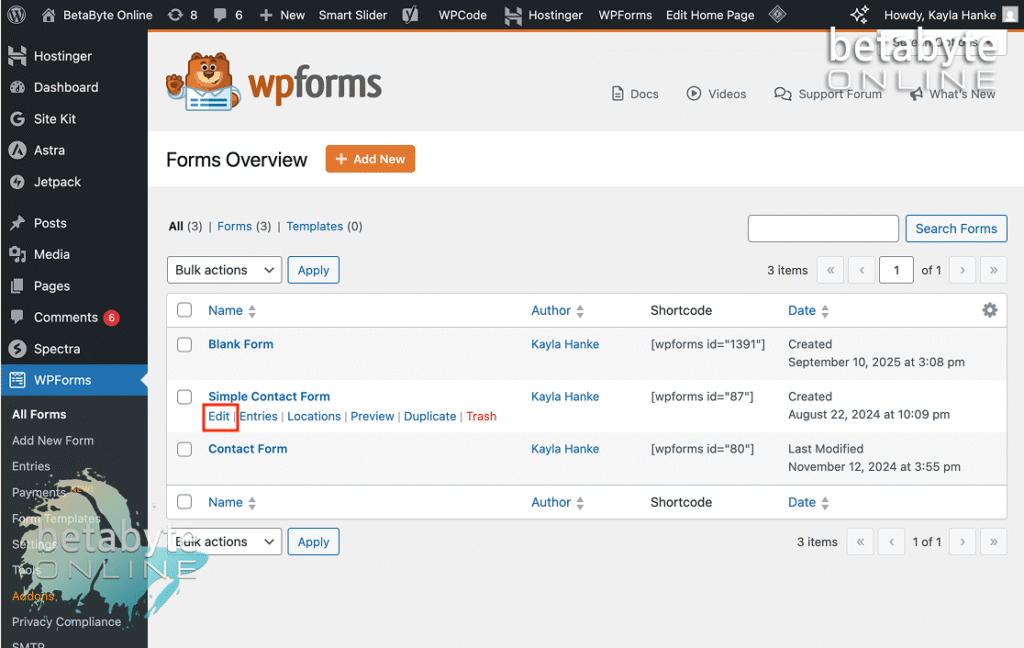
Select the form you’d like to add reCAPTCHA to and click Edit.
Step 3: Open WPForms Settings
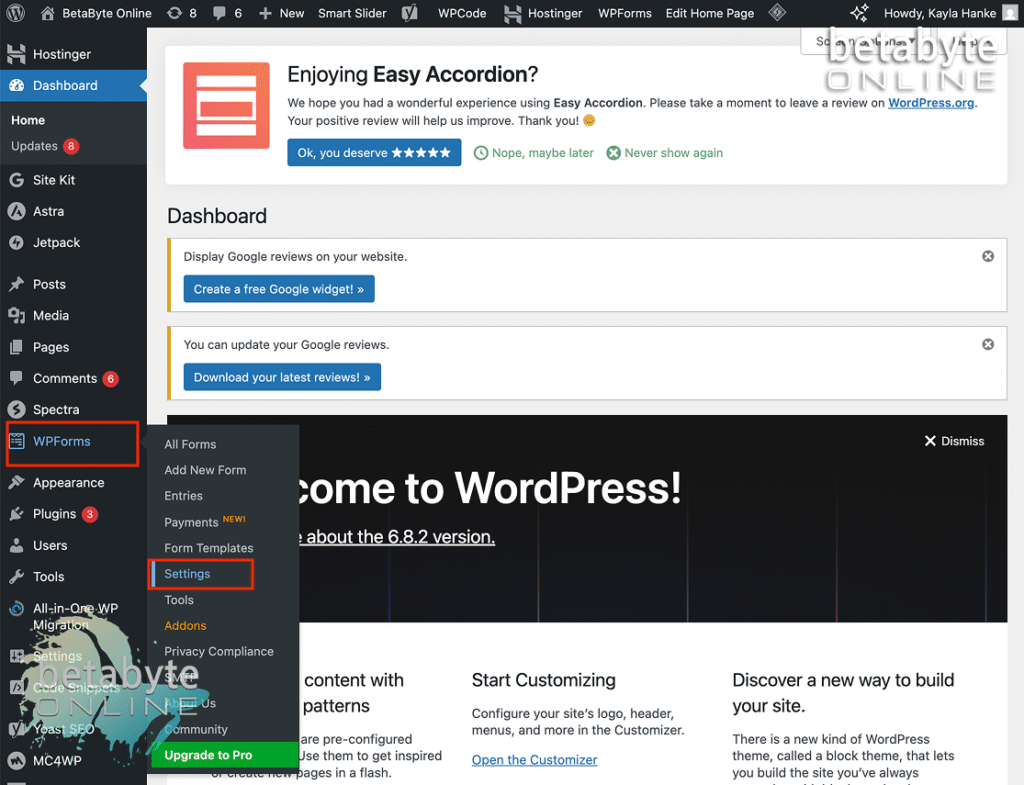
From the WordPress dashboard, go to:
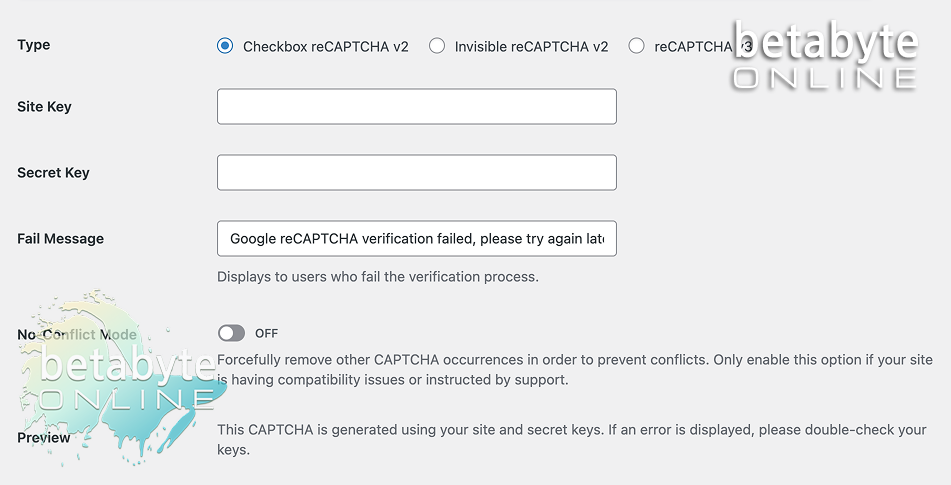
WPForms > Settings > reCAPTCHA
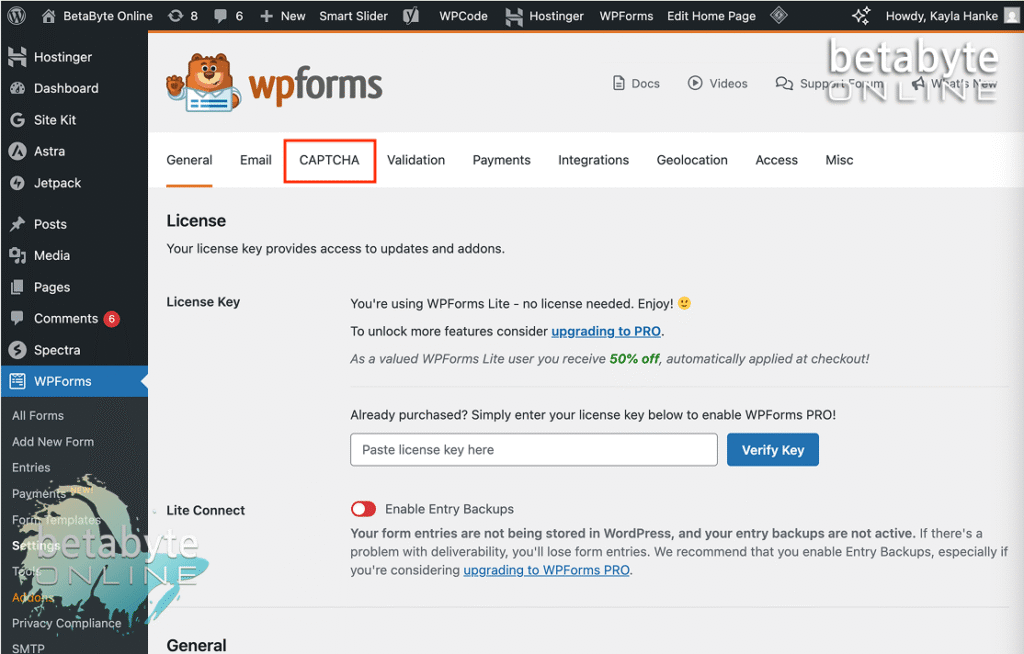
Step 4: Choose Your reCAPTCHA Type
Scroll down and select the type of reCAPTCHA you want to use. Most websites will be fine with reCAPTCHA v2, but there are other options if you need advanced protection.
👉 For more information, check out <u>[this article on which reCAPTCHA type to choose]</u>.
Step 5: Get Your Google reCAPTCHA Keys
To enable reCAPTCHA in WPForms, you’ll need to register your website in Google’s reCAPTCHA Admin Console and generate your keys.
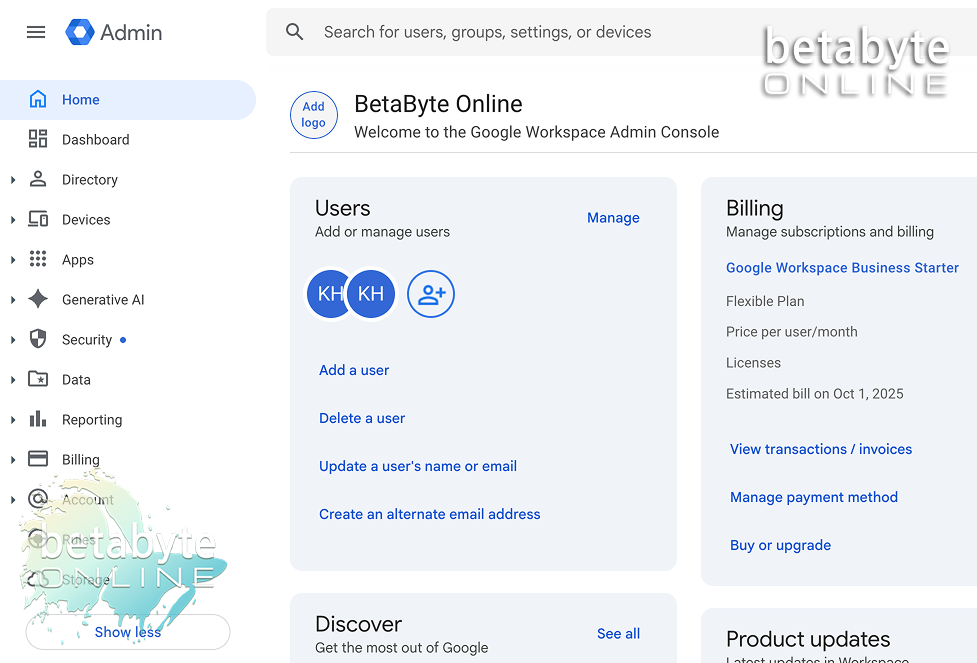
Log in to Google Admin
Make sure you’re logged in to your Google Admin account:
Google Admin or this link https://admin.google.com
Open the reCAPTCHA Setup Page
Go to the reCAPTCHA setup page:
https://www.google.com/recaptcha/admin
Enter Your Website Details
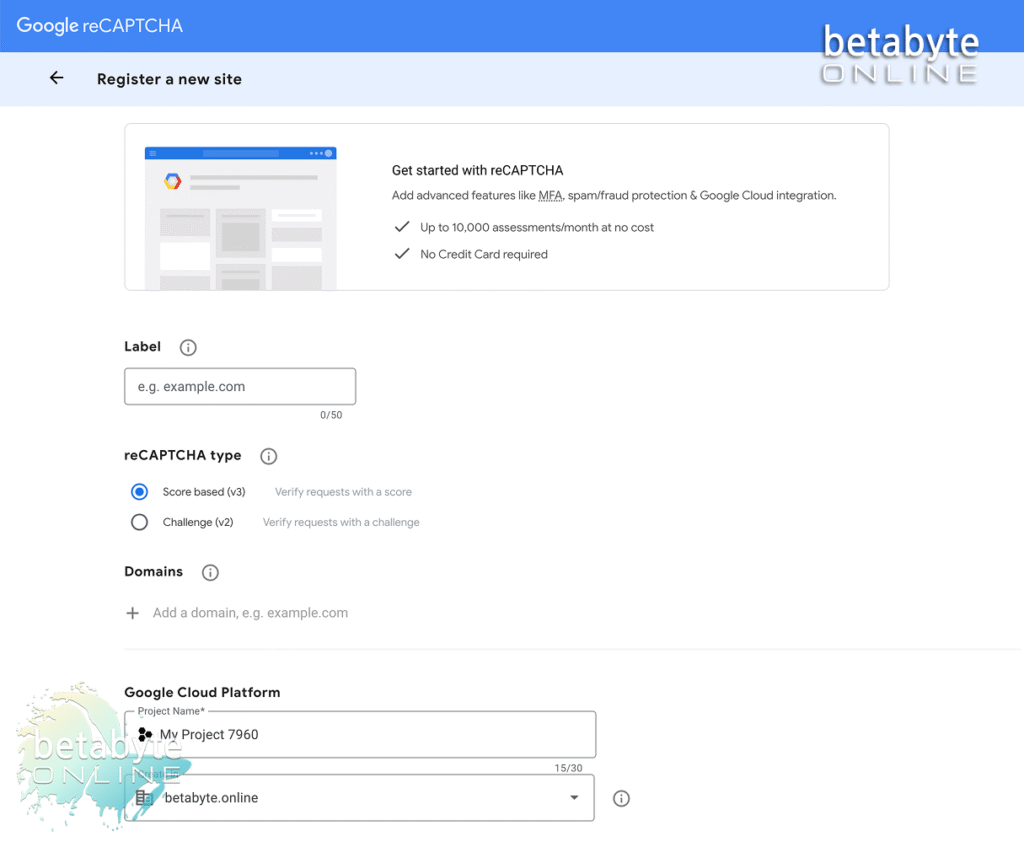
Fill in your website information:
- Label: Choose a simple label so you’ll recognize which website the reCAPTCHA belongs to. (I usually just use the website domain, like example.com.)
- reCAPTCHA Type: Select the type of reCAPTCHA you want to implement. In most cases, reCAPTCHA v2 is sufficient to stop spam bots.

👉 For more guidance, see this article on choosing the right type of reCAPTCHA].
Add Your Domain(s)
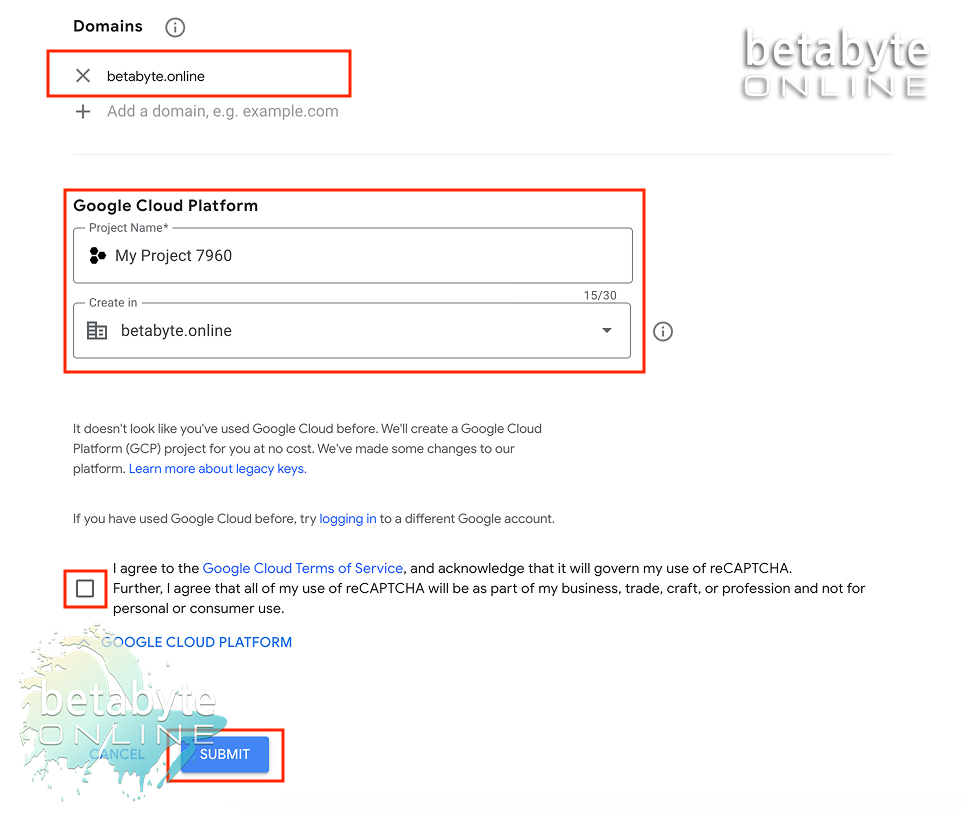
Enter your domain(s). When you register your primary domain, Google will automatically cover any subdomains (like shop.example.com, staging.example.com, or info.example.com). You don’t need to enter each one individually.
Create a New Google Project
Assign the reCAPTCHA to a new Google Project:
- Give the project a name you’ll remember later.
- Select the organizational unit where it should belong.
- Agree to Google Cloud’s Terms of Service.
- Click Submit.
Retrieve Your Keys
Once submitted, Google will generate your Site Key and Secret Key. These appear as long strings of letters and numbers (a mix of upper and lowercase).
⚠️ Do not share these keys with anyone. They protect your forms and website from spam and security breaches.
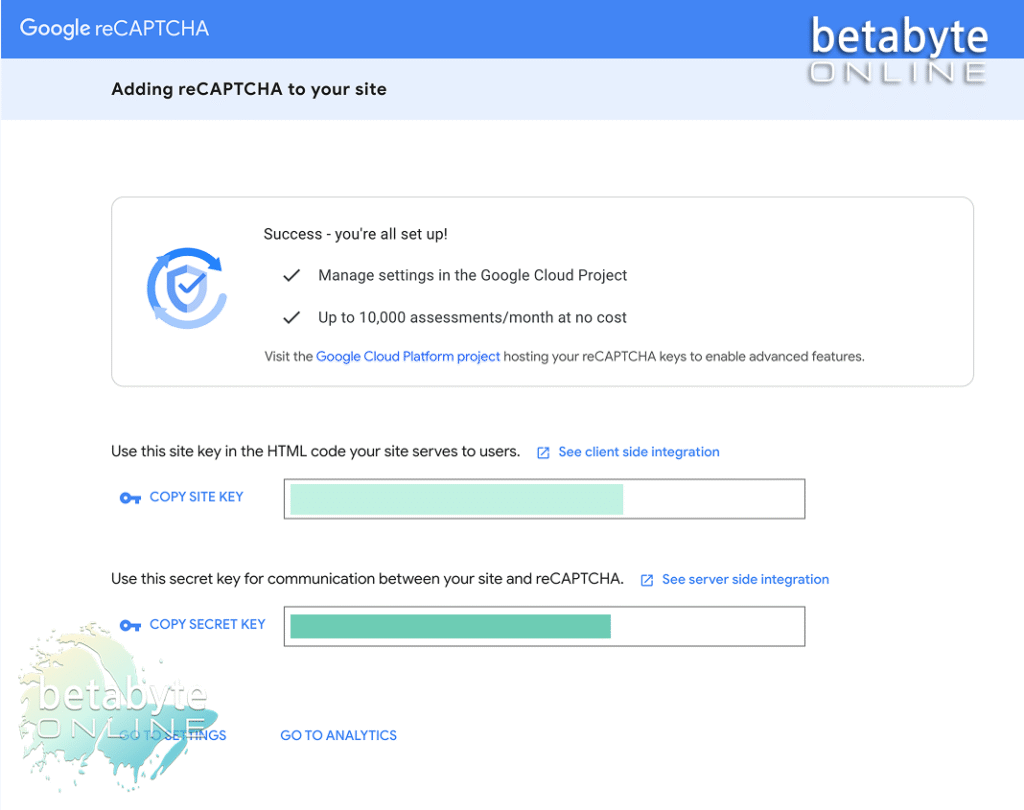
Step 6: Copy and Paste Your Keys into WPForms
Add Keys to WPForms
- Go to WPForms > Settings > reCAPTCHA in your WordPress dashboard.
- Copy and paste your Site Key and Secret Key into the correct fields.
- Make sure the correct type of reCAPTCHA (e.g., v2) is selected.
- Click Save Settings.
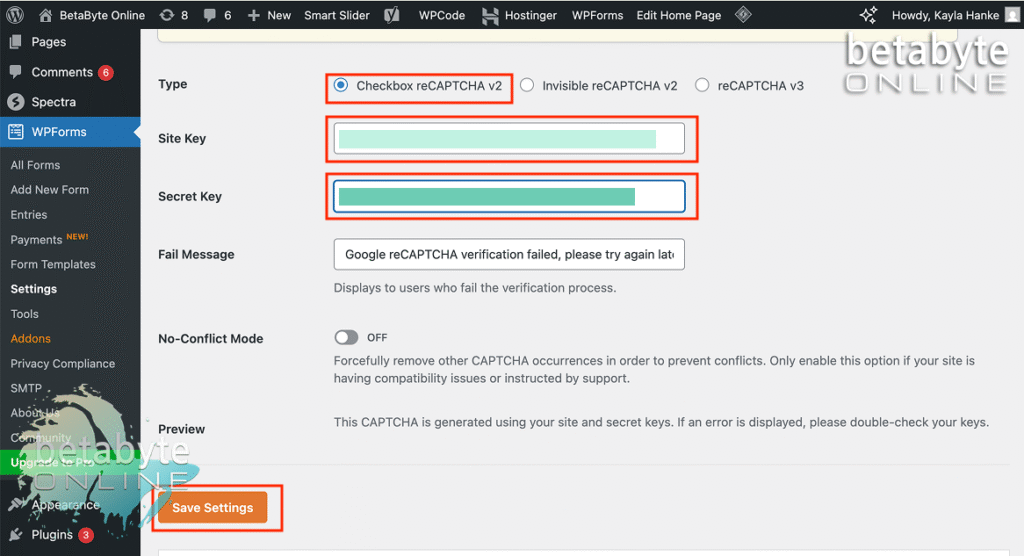
Step 7: Add reCAPTCHA to a Form
Open Your Form
- Go to WPForms > All Forms.
- Select Edit on the form you want to protect.
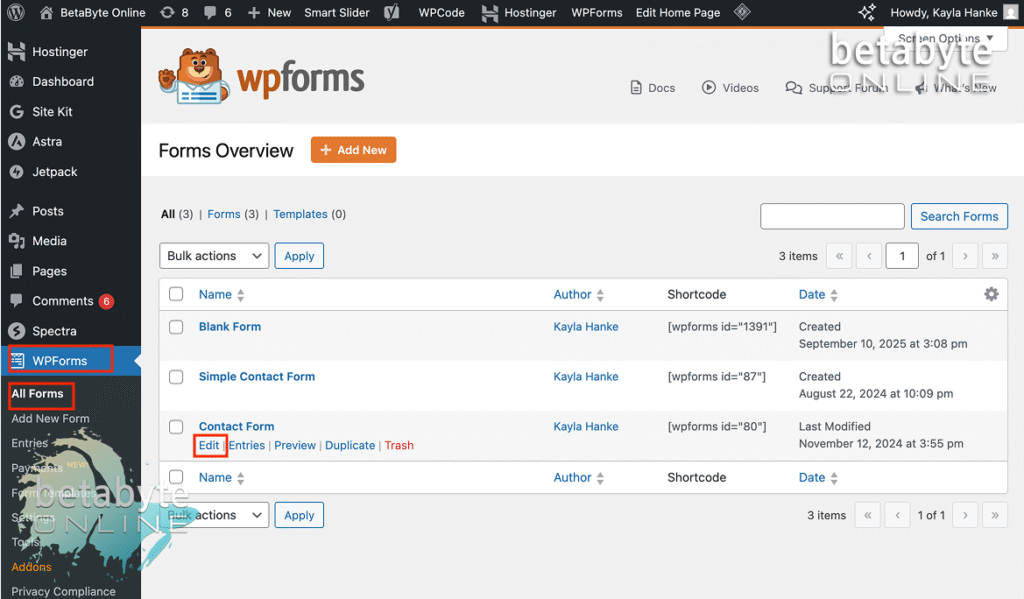
Add the reCAPTCHA Field
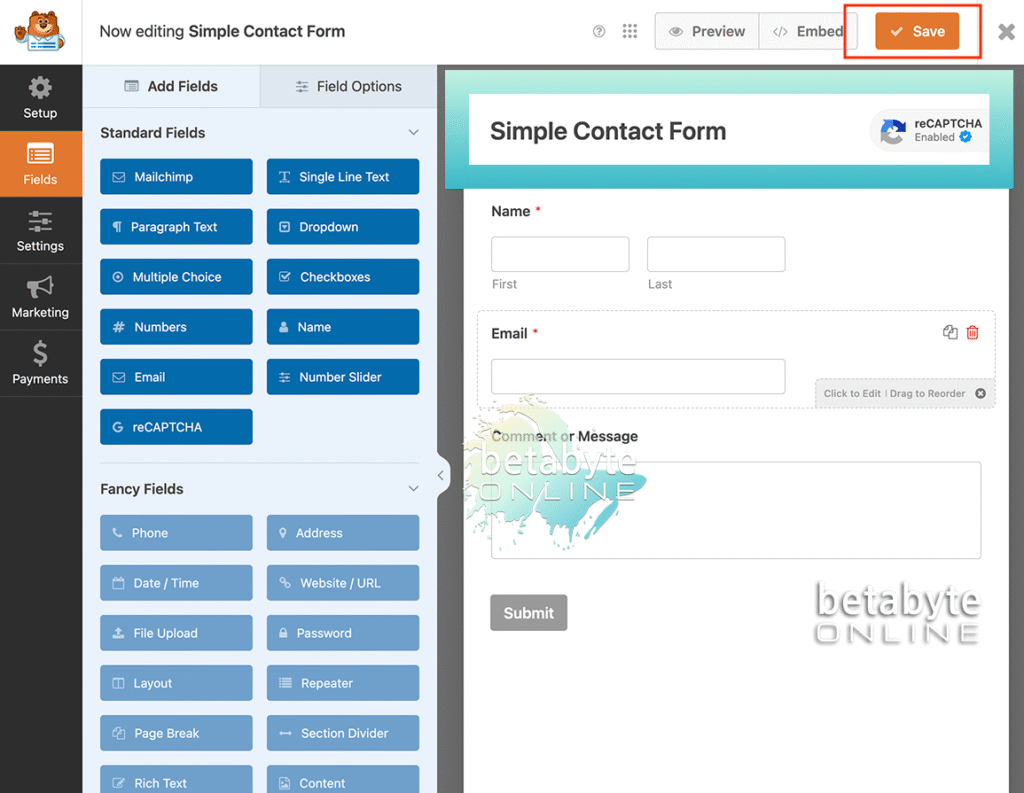
- Under Fields, add reCAPTCHA.
- Verify it matches the reCAPTCHA type you registered in Google.
- Save your form after adding it.
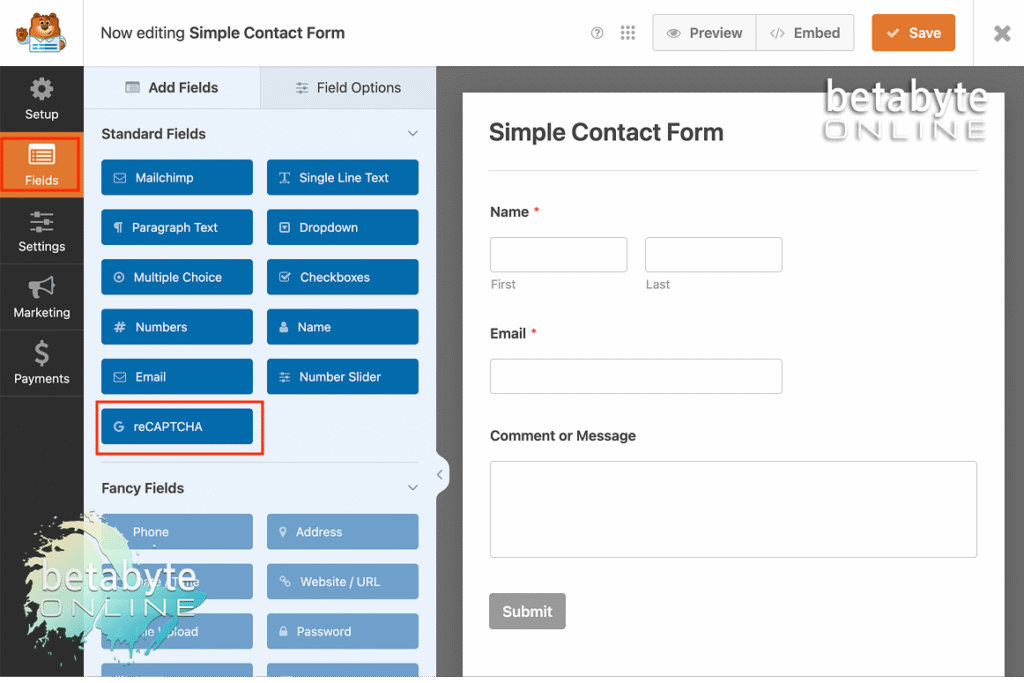
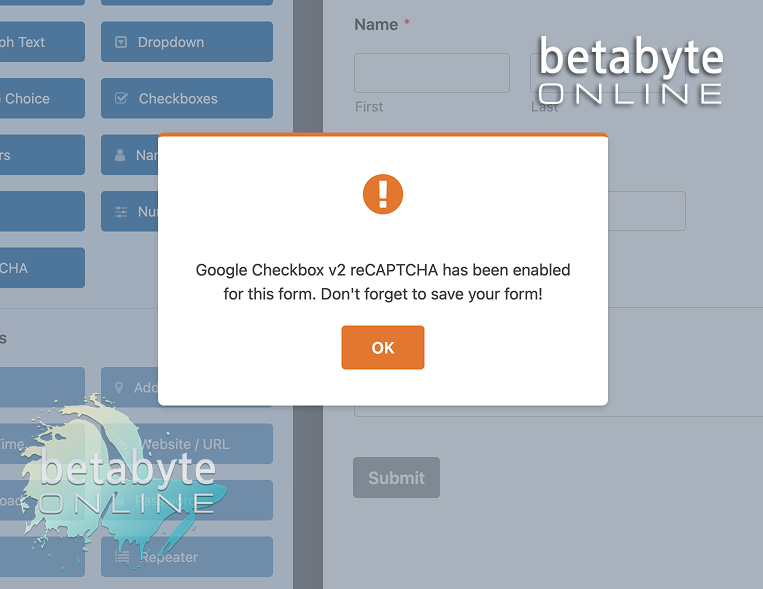
Step 8: Verify reCAPTCHA Is Working
Once enabled, you’ll see the reCAPTCHA badge in the top right corner of your form. That’s it — your form is now protected from spam bots! 🎉
By adding reCAPTCHA to your WPForms, you’ve taken a big step in protecting your website from spam bots and securing your users’ data. Not only does this keep your inbox clean, but it also helps safeguard your domain’s reputation and SEO standing with Google.