A DMARC (Domain-based Message Authentication, Reporting, and Conformance) record is a type of DNS entry that tells receiving mail servers how to handle emails sent from your domain that fail authentication checks. It works alongside SPF and DKIM to provide a layered email security system. Setting up DMARC is important for all domains, regardless of which mail service you use—Google Workspace, Microsoft 365, or another provider—because it helps prevent spoofing, phishing, and other fraudulent email activity.
Setting up DMARC is typically done after you’ve verified that your MX records are valid and your email authentication (SPF and DKIM) is properly configured. The screenshots you’ll see in this guide reflect the DNS editing interface in a hosting backend; your interface may look slightly different depending on your nameserver host, but the essential entries will be the same.
Before You Start: Log Into Your DNS Host
Sign into the account that manages your domain’s DNS records. Keep in mind: if your nameservers point to a hosting provider (like Hostinger, Cloudflare, Bluehost, or another service), you’ll edit your DNS there—not necessarily at your domain registrar. Without access to your DNS host, you won’t be able to add a DMARC record, so make sure you have login credentials before proceeding.
Why DMARC is Different from DKIM and SPF
While SPF and DKIM authenticate individual emails—verifying that a message is sent from an authorized server and hasn’t been altered—DMARC tells receiving mail servers how to handle messages that fail those checks. For example, a DMARC policy can instruct Gmail or Outlook to reject or quarantine emails that fail SPF or DKIM verification. DMARC also allows you to receive reports about email authentication activity, helping you monitor your domain and catch potential issues before they affect deliverability. Together, SPF, DKIM, and DMARC form a complete authentication system that protects your brand, improves email deliverability, and prevents phishing attacks.
Writing Your DMARC Record
When creating a DMARC record, you’ll be adding a TXT record to your domain’s DNS. Here’s the basic structure to consider:
- Record Name / Host: _dmarc
TXT Value: The policy for your domain, such as:
v=DMARC1; p=none; rua=mailto:reports@yourdomain.com; ruf=mailto:failures@yourdomain.com; fo=1
- Explanation:
- v=DMARC1 identifies the record as a DMARC entry.
- p=none tells receiving servers to monitor only; you can later change to quarantine or reject.
- rua= is where aggregate reports are sent.
- ruf= is where detailed failure reports are sent for troubleshooting.
- fo=1 specifies reporting options for forensic messages.
- v=DMARC1 identifies the record as a DMARC entry.
Tip: Start with p=none while you monitor your email flow. Once you’re confident that SPF and DKIM are properly configured, you can move to stricter policies (quarantine or reject) to fully protect your domain.
For more advanced setups, or to ensure proper email addresses are used for DMARC reporting, check with your domain host or use resources from your mail provider.
For a better breakdown of how to write a DMARC record, read our article: Article; Breaking Down the Essential Components in a DMARC Record (And How to Write One That Works)
How to Add a DMARC Record to Your Domain
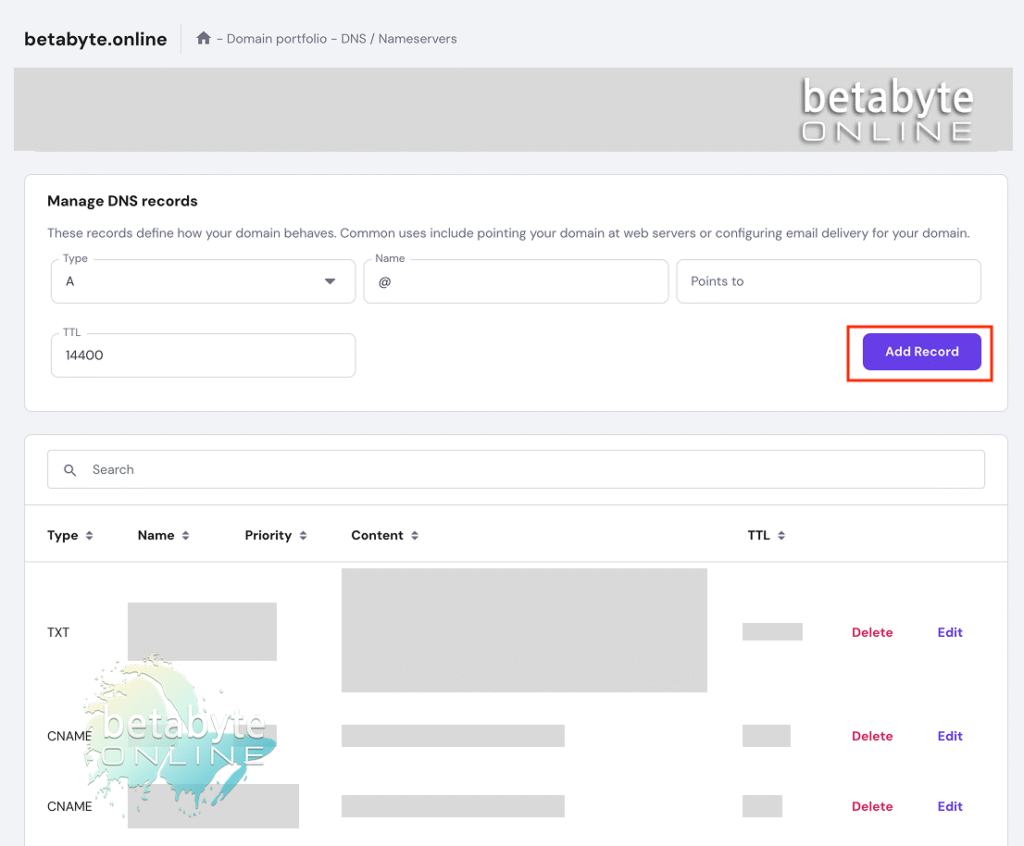
Once you have your DMARC record written and ready to go, log into your DNS host provider and select “Add Record.”
Choose Record Type
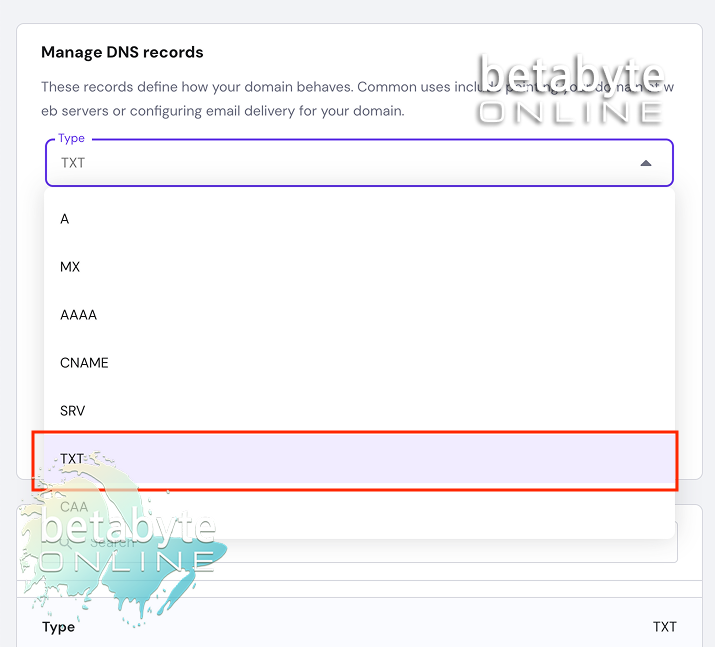
From the dropdown for record type, select TXT Record.
Set the Host/Name
Under “Name” (sometimes shown as “Host” or “Record Name”), enter:
_dmarc
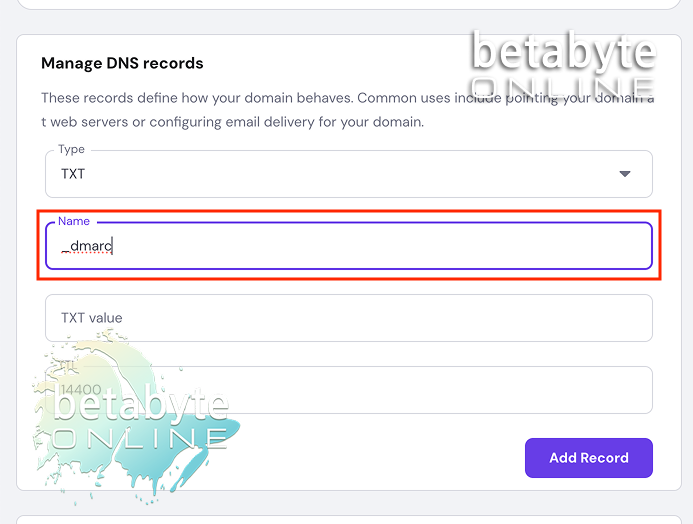
👉 This is always required because it tells mail servers that this TXT entry is specifically for DMARC policy instructions, not a generic text record or something else. Without _dmarc, the receiving server wouldn’t know to look at this record for authentication rules.
Add the TXT Value
In the TXT value field, paste the DMARC value you wrote earlier. If you’re not sure how to write one, check out our article: Breaking Down the Essential Components in a DMARC Record and How to Write One That Functions.
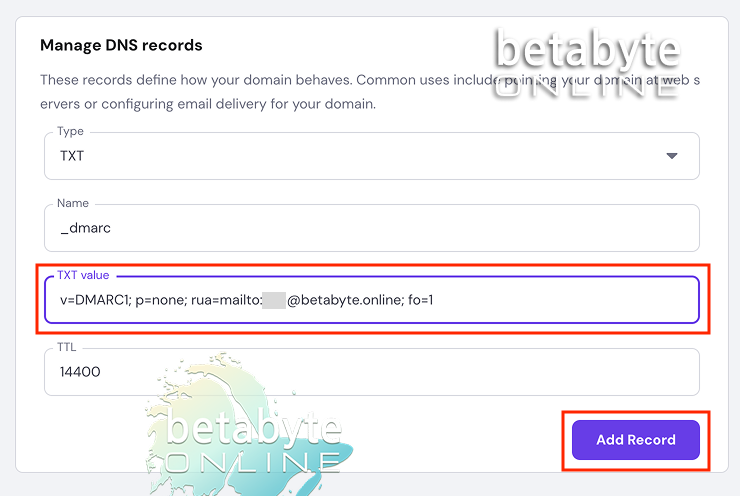
Set the TTL
For TTL (time to live), the default 14,400 seconds (4 hours) works perfectly for most users. That means DNS servers will cache your DMARC record for 4 hours before refreshing.
👉 Some hosts (like Cloudflare) allow much shorter TTLs (as low as 60 seconds), which is helpful if you’re actively testing new records and want faster propagation. But for the average business, leaving it at 14,400 ensures stability without extra strain. Rarely, if you’re in a high-volume testing environment or your IT team needs rapid record turnover, you might lower the TTL temporarily.
Why DMARC Uses TXT Records
DMARC is always set up as a TXT record because DNS uses text records to store instructions for mail servers (like SPF, DKIM, and DMARC). TXT records let domain owners publish security and authentication details that servers can read and follow.
👉 MX records, on the other hand, are only used to define where email should be delivered (the mail exchange server) — not how it should be authenticated. That’s why DMARC belongs in a TXT record. If you’d like a deeper dive into DNS record types and how they work together, check out our article on Understanding DNS Records: MX, TXT, CNAME, and More.
Verify the Record
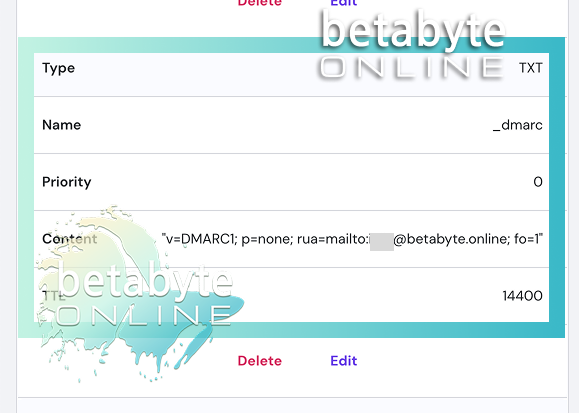
After saving, scroll through your DNS TXT records to confirm that your new DMARC record is listed. If you see it there, you’re good to go — now it just needs time (anywhere from a few minutes up to 24–72 hours) to fully propagate across the internet.
The Gmail Hack: Is Your DMARC Working?
Send a Test Email (DMARC Edition)
After adding your DMARC record, send an email from your domain (for example, you@betabyte.online) to an external Gmail account you own.
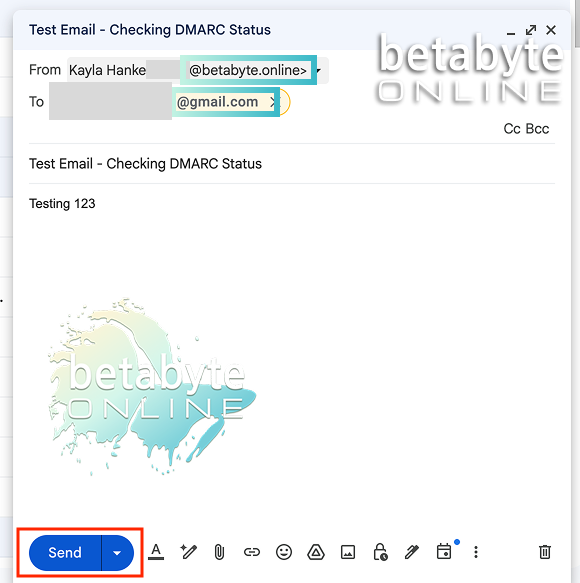
👉 Don’t send it to yourself at the same domain (you@betabyte.online → team@betabyte.online), because internal messages can skip authentication checks and give misleading results.
Check Headers in Gmail
Once your test email arrives:
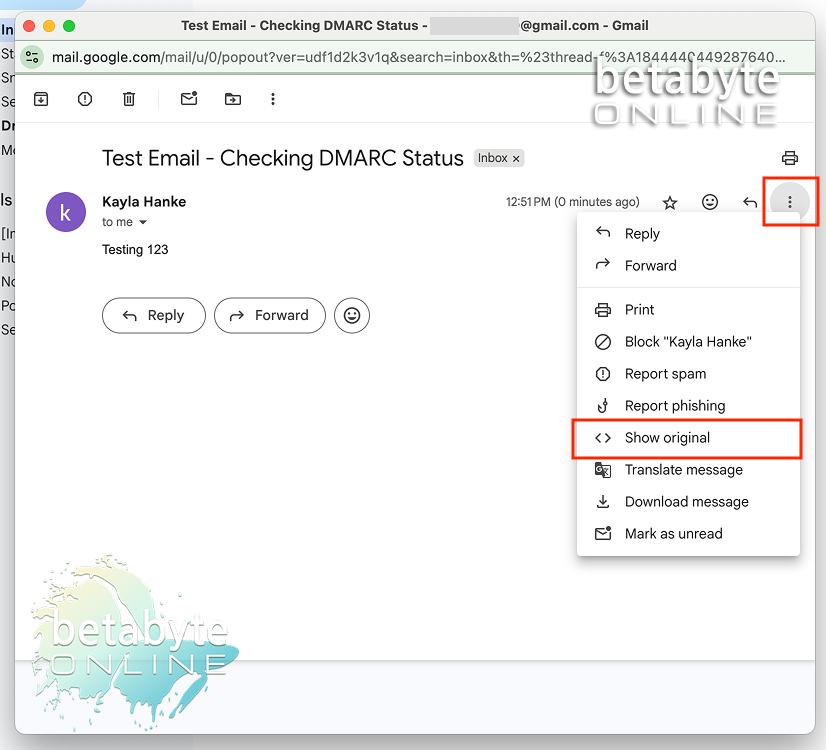
Open the email in Gmail.
Click the three dots next to Reply, then select Show Original.
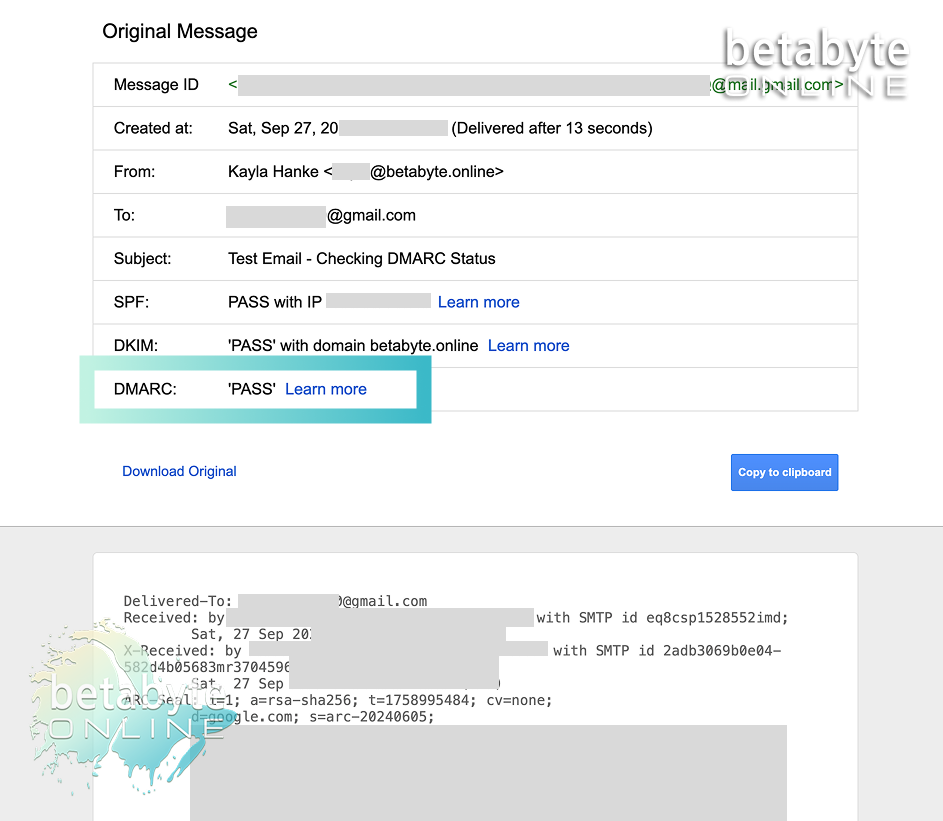
Look for the line Authentication-Results in the header.
When you see dmarc=pass, 🎉 your DMARC record is live and working!
If It Doesn’t Pass
If DMARC fails, double-check that:
- Your TXT record is entered exactly (no missing semicolons or extra spaces).
- SPF and DKIM are both correctly set up (DMARC requires at least one of them to align).
- DNS propagation has finished (wait up to 72 hours in some cases).
- You’ve used the correct syntax for your policy (p=none, p=quarantine, or p=reject).
Don’t Forget SPF and DKIM
DMARC doesn’t work in isolation. It relies on:
- SPF (Sender Policy Framework) – defines which servers are allowed to send for your domain.
- DKIM (DomainKeys Identified Mail) – provides a digital signature to verify your messages haven’t been altered.
Together, SPF + DKIM + DMARC form a three-layered defense system that tells mail servers:
- “This email is authorized to come from my domain.”
- “It hasn’t been tampered with in transit.”
- “Here’s what to do with fake emails pretending to be us.”
For next steps, check out these guides:
👉 How to Add a DKIM Record to Your Domain with Google Workspace (And Why You Need To)
👉 What Is an SPF Record and Why It Matters for Your Emails
Keeping Your Emails Secure and Professional
Setting up DMARC is one of the most important ways you can protect your business from phishing, spoofing, and spam issues. When combined with SPF and DKIM, you’ll drastically improve deliverability and ensure that your messages reach inboxes with credibility.
And if all this DNS editing feels a little overwhelming? No stress. Reach out to us at BetaByte Online — we’re happy to handle the technical heavy lifting so you can stay focused on running your business while knowing your emails are safe, secure, and professional.