SPF stands for Sender Policy Framework. An SPF record is a DNS TXT entry that tells mail servers which services are allowed to send email on behalf of your domain. After you’ve added DKIM for Gmail/Google Workspace, SPF is the next logical step: it helps receiving mail servers verify that an email claiming to be from your domain actually comes from an authorized mail sender. If you don’t have an SPF record, your emails are much more likely to be marked as spoofed or spam — which means lost leads, missed notifications, and frustrated customers. If you need help at any point, contact your DNS host (where your domain’s DNS is managed) or reach out to us at BetaByte Online. For simplicity, this article shows how to edit DNS in your host’s backend only.
Read more about DKIM and why you should set it up first: What is a DKIM Key and Why Do You Need One?
To read more about what an SPF record is, check out this article; What is an SPF Record (And Why It Matters for Your Domain’s Email Deliverability)
Before You Start
Log into your DNS host
Make sure you can sign in to the account that manages your domain’s DNS records. If your nameservers point to a hosting provider (for example Hostinger, Cloudflare, or another host), you’ll edit DNS there—not at the domain registrar necessarily. If you don’t have access, you’ll need to get it before you can add SPF.
Why SPF is different from DKIM
Unlike DKIM — which is a unique cryptographic key generated for your Google Workspace account — SPF is a simple policy that lists which mail services may send on your domain’s behalf. Google provides a recommended SPF value that works for most Google Workspace setups because SPF works by checking the sender against a published list of authorized servers, not by using a private/public keypair.
Google’s Recommended SPF Record
SPF value to use for Google Workspace
Use this exact TXT value for standard Google Workspace email sending:
_v=spf1 include:spf.google.com ~all
When you might change the SPF value
If you send email through other services in addition to Google Workspace — for example Mailchimp, SendGrid, Amazon SES, or a CRM that mails on your behalf — you will need to add those services to your SPF policy. That usually means adding another include: or adding their sending IPs. For example, if you use SendGrid you’d add include:sendgrid.net or follow SendGrid’s recommended SPF entry. If you have multiple services, build a single SPF string that lists them all (keeping the final ~all or -all as appropriate). If you’re unsure which value to add, check the documentation for the third-party mailer you use or ask your provider’s support.
Adding the SPF TXT Record in Your DNS
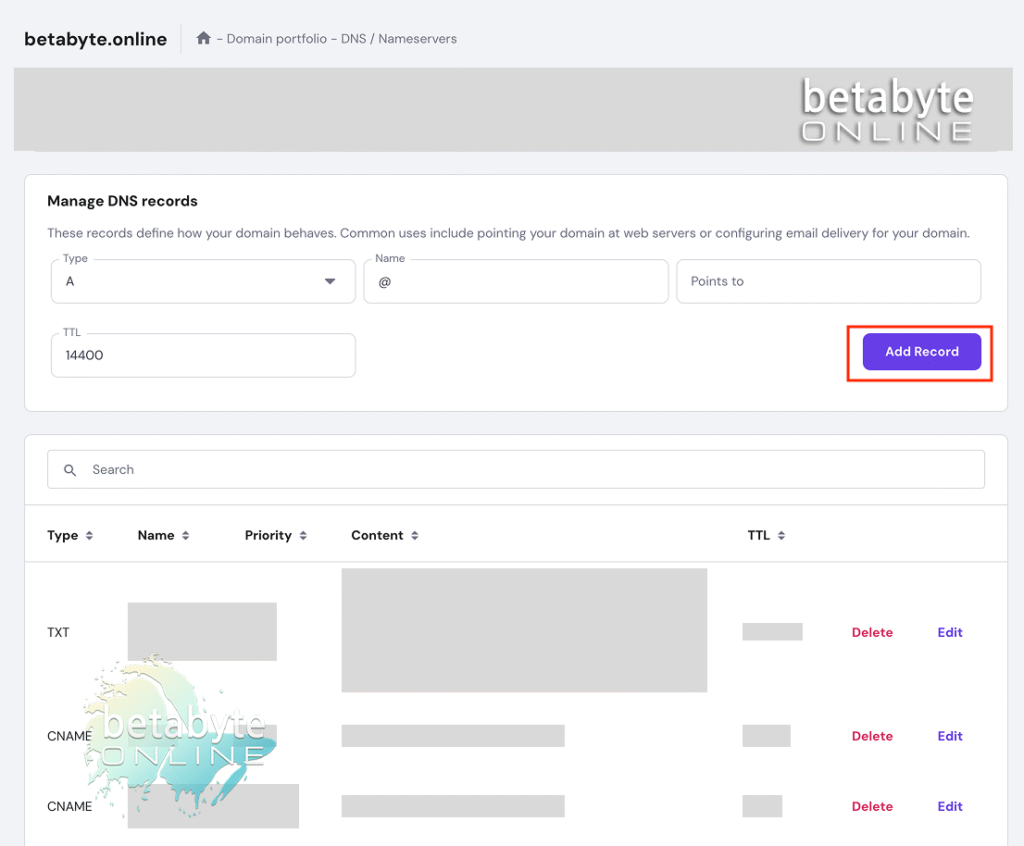
Find the DNS records area
Sign into your DNS host and open the section where you can add or manage DNS records. The page is often called “DNS Management,” “Manage DNS,” “DNS Settings,” or “Zone Editor.”
Add a new TXT record
Create a new TXT record. SPF is stored as a TXT record because TXT records are designed to hold arbitrary text values (like verification strings and policies). Mail servers look up that TXT text to read your SPF rules.
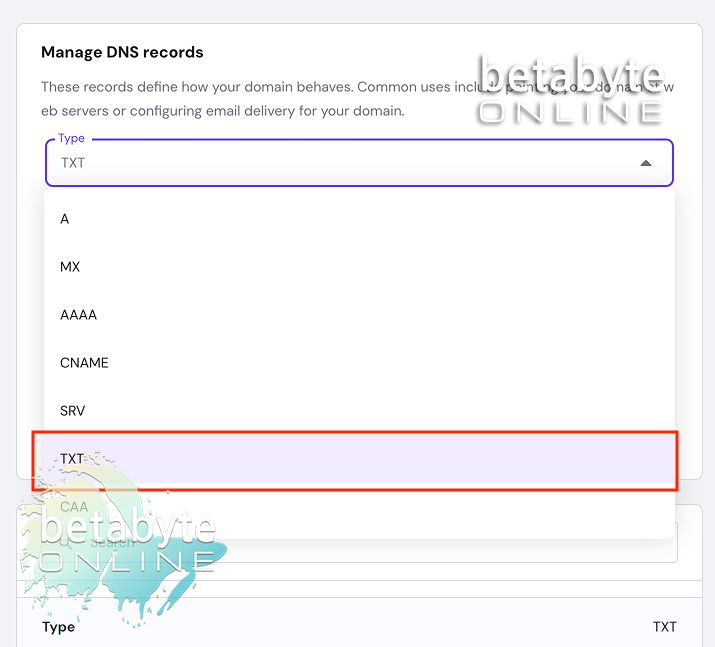
Name / Host
For most providers enter @ as the host (or leave the host/name field blank if your host requires that). That sets the SPF for the root domain.
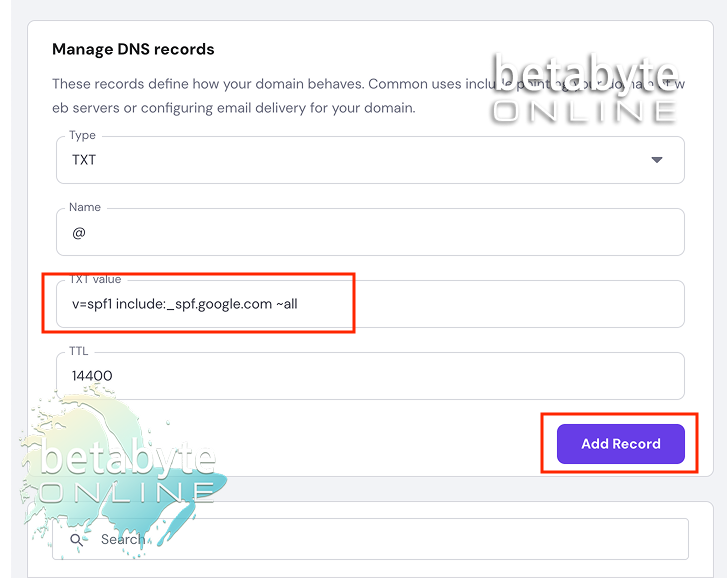
Value
Enter the SPF text exactly as provided:
_v=spf1 include:spf.google.com ~all
This is the canonical Google Workspace SPF. If you’re adding other senders, include them here (for example v=spf1 include:_spf.google.com include:sendgrid.net ~all), but keep the string to one record.
TTL (Time To Live)
Leave the default TTL unless you have a specific reason to change it. A common default is 14,400 seconds (4 hours). If you need changes to propagate faster while testing, you can temporarily set a lower TTL (for example 3,600 seconds / 1 hour), but remember that very low TTLs can increase DNS lookup traffic. After testing, it’s fine to return to the default.
Save your changes
Save or add the record. DNS updates may take some time to propagate — often within minutes but sometimes up to 24–72 hours depending on caches and your provider.
Double-check the record
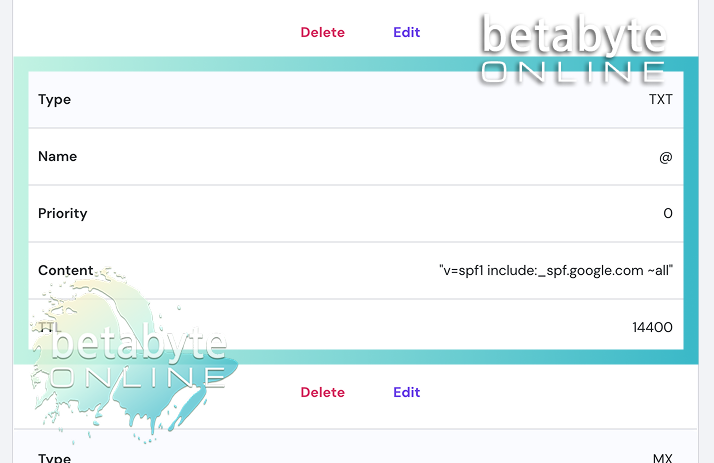
Confirm the record was created
After saving, look in the DNS management screen for your new TXT record and verify the value is correct and that there are no duplicate SPF records. You must have only one SPF TXT record per domain — multiple SPF TXT records can break SPF checks. If you previously had an old SPF entry, replace it with the new combined record rather than creating a second TXT record.
Quick Gmail Test: Is Your SPF Working?
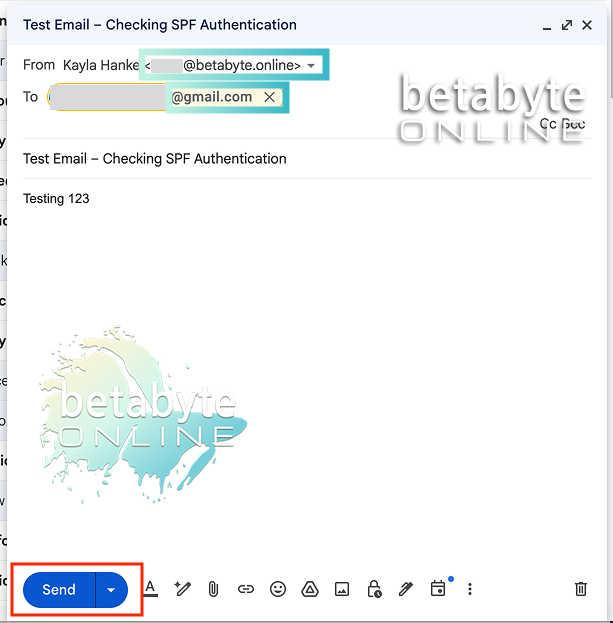
After adding your SPF record to your DNS, send a test email from your domain (for example, you@betabyte.online) to an external Gmail account you own or can access.
👉 Don’t send it to yourself at the same domain (like you@betabyte.online → team@betabyte.online) because that can bypass SPF checks and give you misleading results.
Check Email Headers in Gmail
Once your test email shows up:
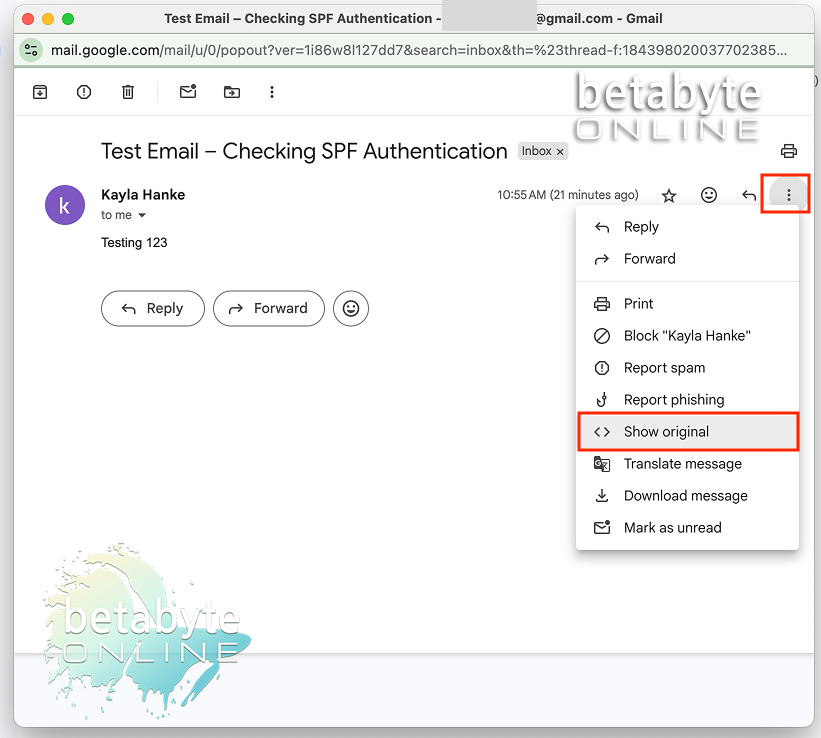
Open the message in Gmail.
Click the three dots next to Reply, then choose Show Original.
Look for the line Authentication-Results in the header.
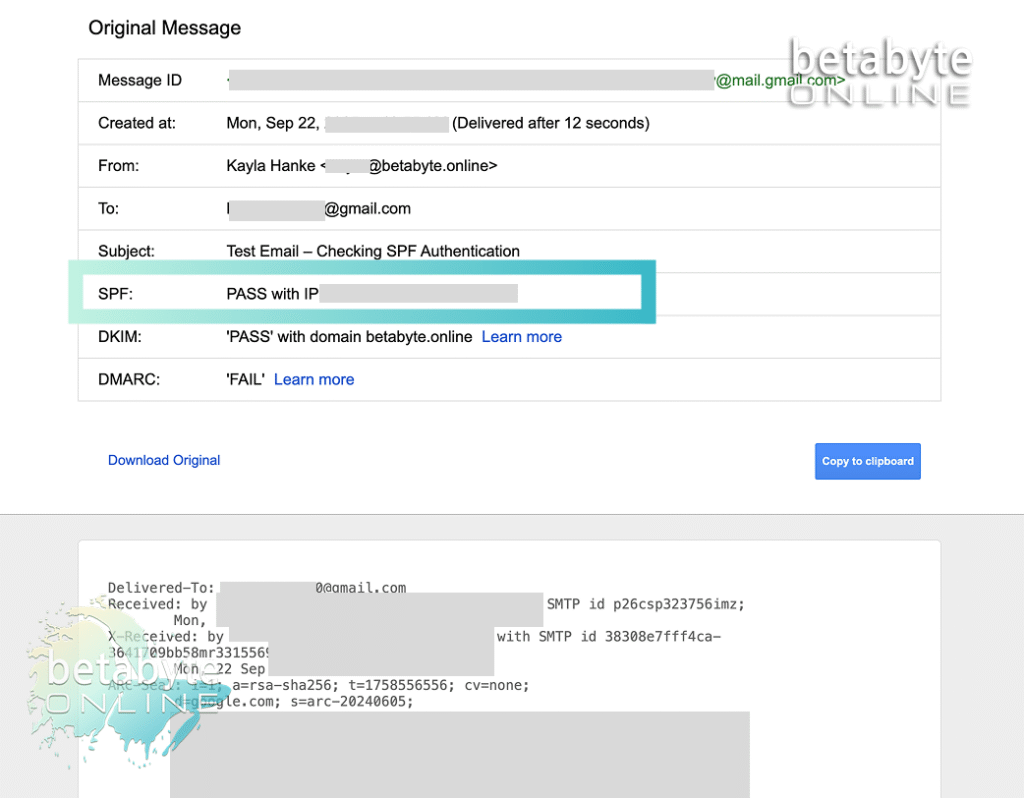
If you see spf=pass, 🎉 your SPF record is live and doing its job!
If it doesn’t pass, double-check your TXT record in DNS. A single typo, missing space, or DNS propagation delay is often the culprit.
If it doesn’t pass
If SPF doesn’t show as passing, double-check that:
- The TXT value is entered exactly (no missing characters or extra quotes).
- There’s only one SPF TXT record for the domain.
- DNS has had enough time to propagate (wait up to 24–72 hours in some cases).
- You included any third-party senders you actually use.
Don’t Forget DKIM and DMARC
SPF is a great start, but it works best as part of the full trio:
- DKIM (DomainKeys Identified Mail)
- DMARC (Domain-based Message Authentication, Reporting, and Conformance)
Together, these three create a rock-solid authentication system that tells receiving mail servers:
- “This message is authorized to come from my domain.”
- “It hasn’t been tampered with in transit.”
- “Here’s how to handle imposters if they try to fake my domain.”
For next steps, check out these articles:
👉 How to Add a DKIM Record to Your Domain with Google Workspace (And Why You Need To)
👉 How to Add a DMARC Record and Why It Matters
Keeping Your Email Deliverability Strong
Setting up SPF is one of the simplest yet most effective ways to protect your domain and make sure your emails land where they belong — in the inbox. Paired with DKIM and DMARC, it gives your business a professional, trustworthy edge in every message you send. And if you ever feel unsure while editing DNS settings or troubleshooting SPF errors, reach out to us at BetaByte Online. We’ll take care of the technical details so you can focus on what you do best — running your business with confidence that your emails are secure and reliable.