Setting up DKIM is a crucial step for authenticating your emails and protecting your domain reputation. But even after generating the key and updating your DNS records, you need to make sure it’s actually working. This article will walk you through a simple trick to verify your DKIM setup in Gmail and Google Workspace.
Note: Changes to DNS records can take some time to propagate. Typically, it may take up to 24–72 hours before your DKIM signature fully activates and passes verification.
Do you need to first setup your dkim? Check out more information on her to do this here:
1. How to Generate a DKIM Key with Google Workspace
2. How To Add A DKIM Record To Your Domain With Google Workspace (And Why You Need To)
3. How to Authenticate Your Domain with DKIM in Google Workspace
Are you… totally confused? Read our informational article, here: What is a DKIM Key and Why Do You Need One?
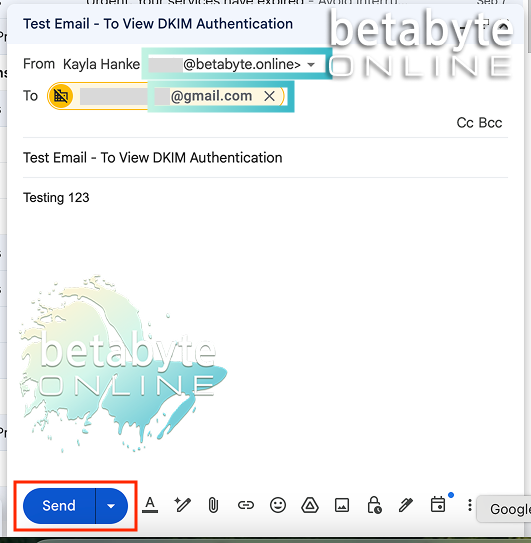
Send a Test Email
After enabling DKIM and updating your DNS records, send a test email from your domain (for example, you@betabyte.online) to an external Gmail account that you own or can access.
It’s important to send this message to an account outside your domain. Sending an email to yourself within the same domain (like you@betabyte.online to another @betabyte.online address) can bypass certain authentication checks, giving a false impression that your DKIM setup is working correctly.
Check Email Headers in Gmail
Once your test email arrives:
Open the email in Gmail.
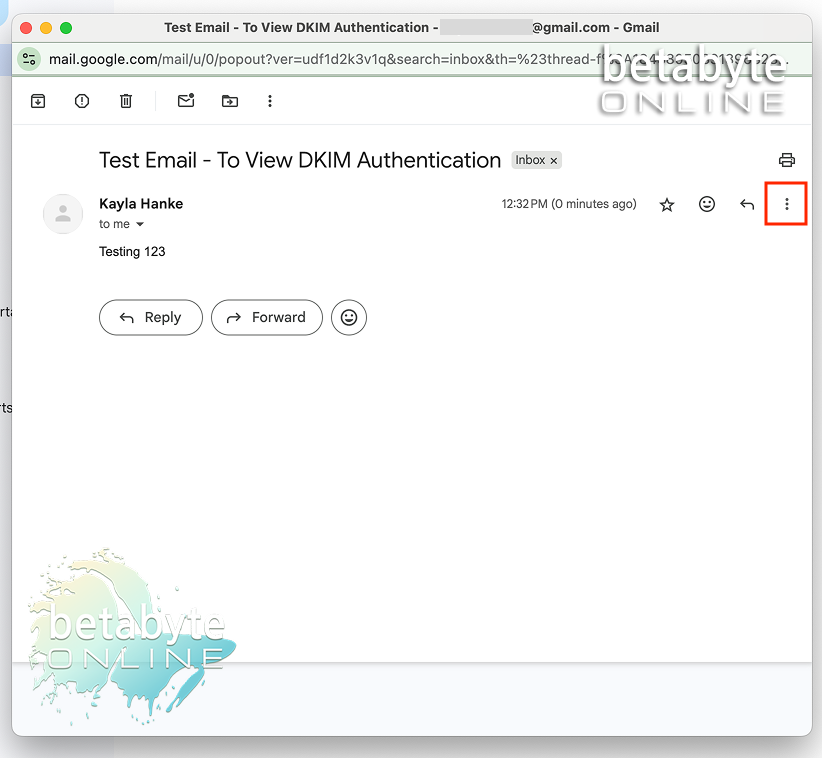
Click the three dots next to Reply, then select Show Original.

Look for the line Authentication-Results in the email header.
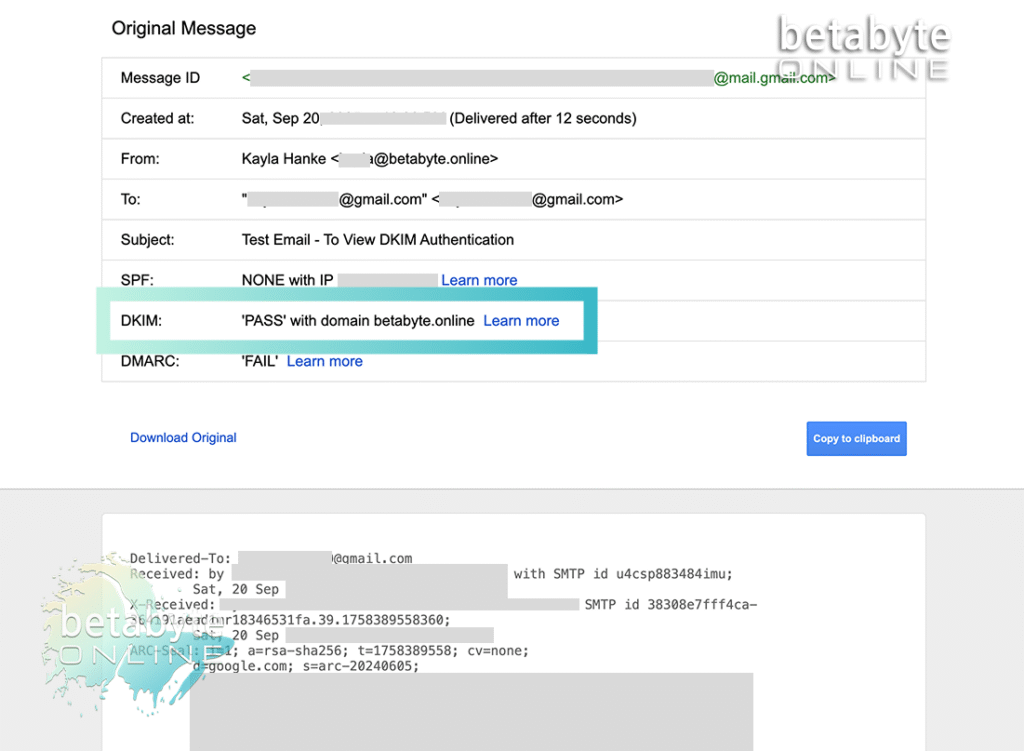
If you see dkim=pass, 🎉 your DKIM key is live and working!
If DKIM doesn’t show as passing, double-check your DNS records and authentication settings. Sometimes a small typo or propagation delay can cause the verification to fail.
Don’t Forget DMARC and SPF
While DKIM is an essential step for authenticating your domain and improving email deliverability, it’s only one piece of the puzzle. To fully secure your email setup and prevent spoofing, phishing, or spam issues, you should also configure:
- SPF (Sender Policy Framework)
- DMARC (Domain-based Message Authentication, Reporting, and Conformance)
Together, SPF, DKIM, and DMARC create a layered authentication system that tells receiving mail servers:
- This message is allowed to come from my domain.
- It has not been tampered with in transit.
- Here’s what to do if someone tries to impersonate us.
For next steps, check out these articles:
Keeping Your Emails Safe and Delivered
Verifying your DKIM setup is a quick and powerful way to make sure your emails are being delivered reliably and safely. If you run into any issues, or if all this tech feels overwhelming, reach out to us at BetaByte Online. We’re happy to help you get your email authentication fully set up so you can focus on running your business — without worrying about spam filters or lost messages.